


-
Sausage Cheddar Bread
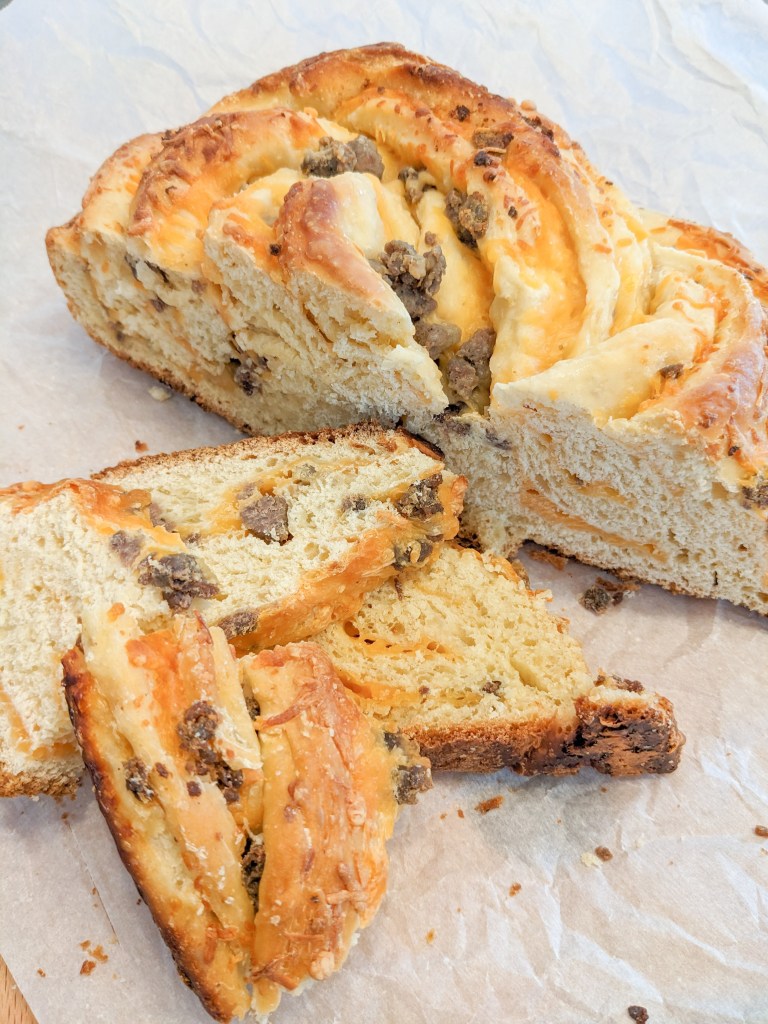
I am from Wisconsin, so of course, I love cheese and sausage. If you’re a cheese lover like me, or a fan of savory baked goods, you are going to love this recipe for sausage cheddar bread. This hearty and flavorful bread is filled with pork sausage and cheddar cheese, making it a perfect way to start your day. You can serve it with a side of eggs, bacon, or your favorite breakfast dish. It is also great as a snack or side dish to serve at parties. The combination of the crusty exterior, with the savory blend of sausage, spices, and cheese on the inside makes this bread truly irresistable. The best part is, even if you’re not an experienced baker, it’s pretty easy to make.

Ingredients:
- All-purpose flour
- Sugar
- Instant rapid-rise yeast
- Red pepper flakes
- Salt
- Water
- Eggs
- Unsalted butter
- Shredded cheddar cheese
- Cooked pork sausage

Let’s Bake:
In the bowl of a stand mixer, whisk together the flour, sugar, yeast, red pepper flakes, and salt. In a liquid measuring cup, whisk together the warm water, eggs, egg yolk, and melted butter. Add the egg mixture to the flour mixture in the mixing bowl. Using a dough hook, knead on medium speed until the dough clears the bottom and sides of the bowl. This should take 4-8 minutes. Shape the dough into a ball and transfer to a greased bowl, turning the dough to coat the dough. Cover the bowl with plastic wrap and let the dough rise in a warm place until doubled in size, 1.5-2 hours. While the dough is rising, brown your pork sausage in a cast iron skillet. Add salt, pepper, and red pepper flakes to taste. Drain the grease and allow the pork sausage to cool.
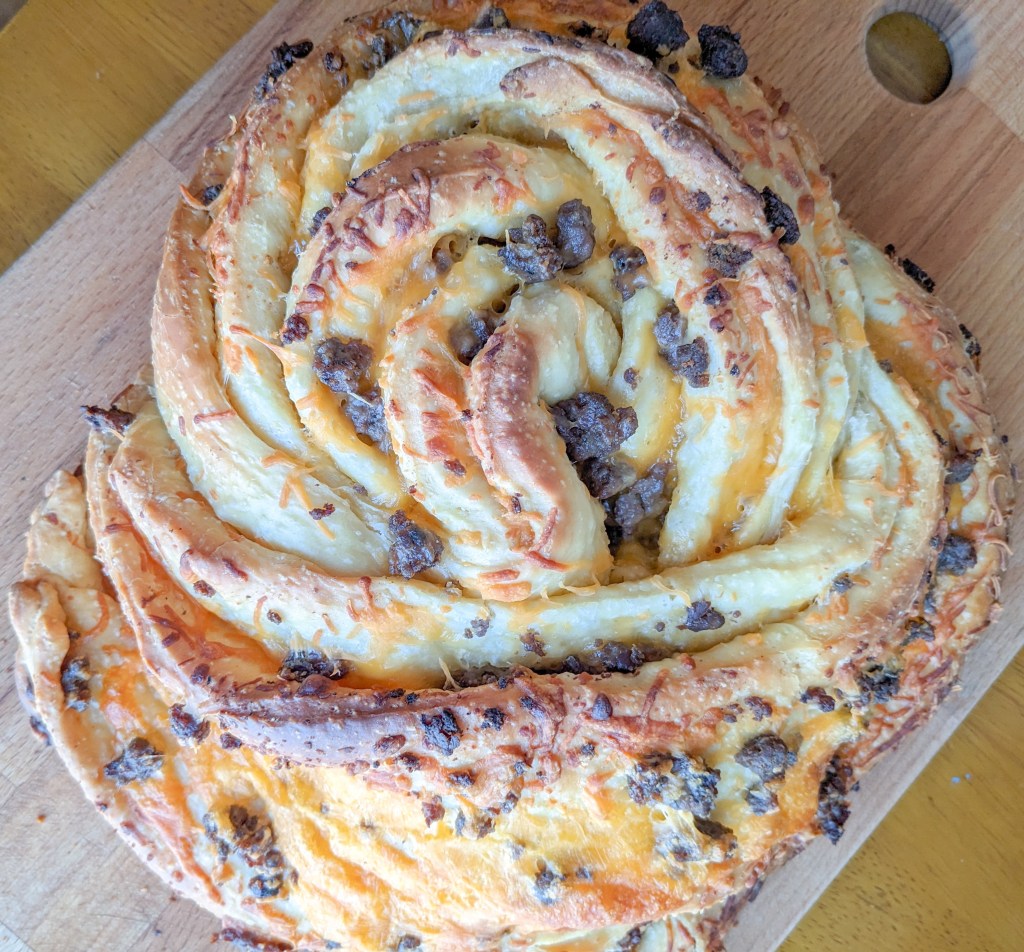
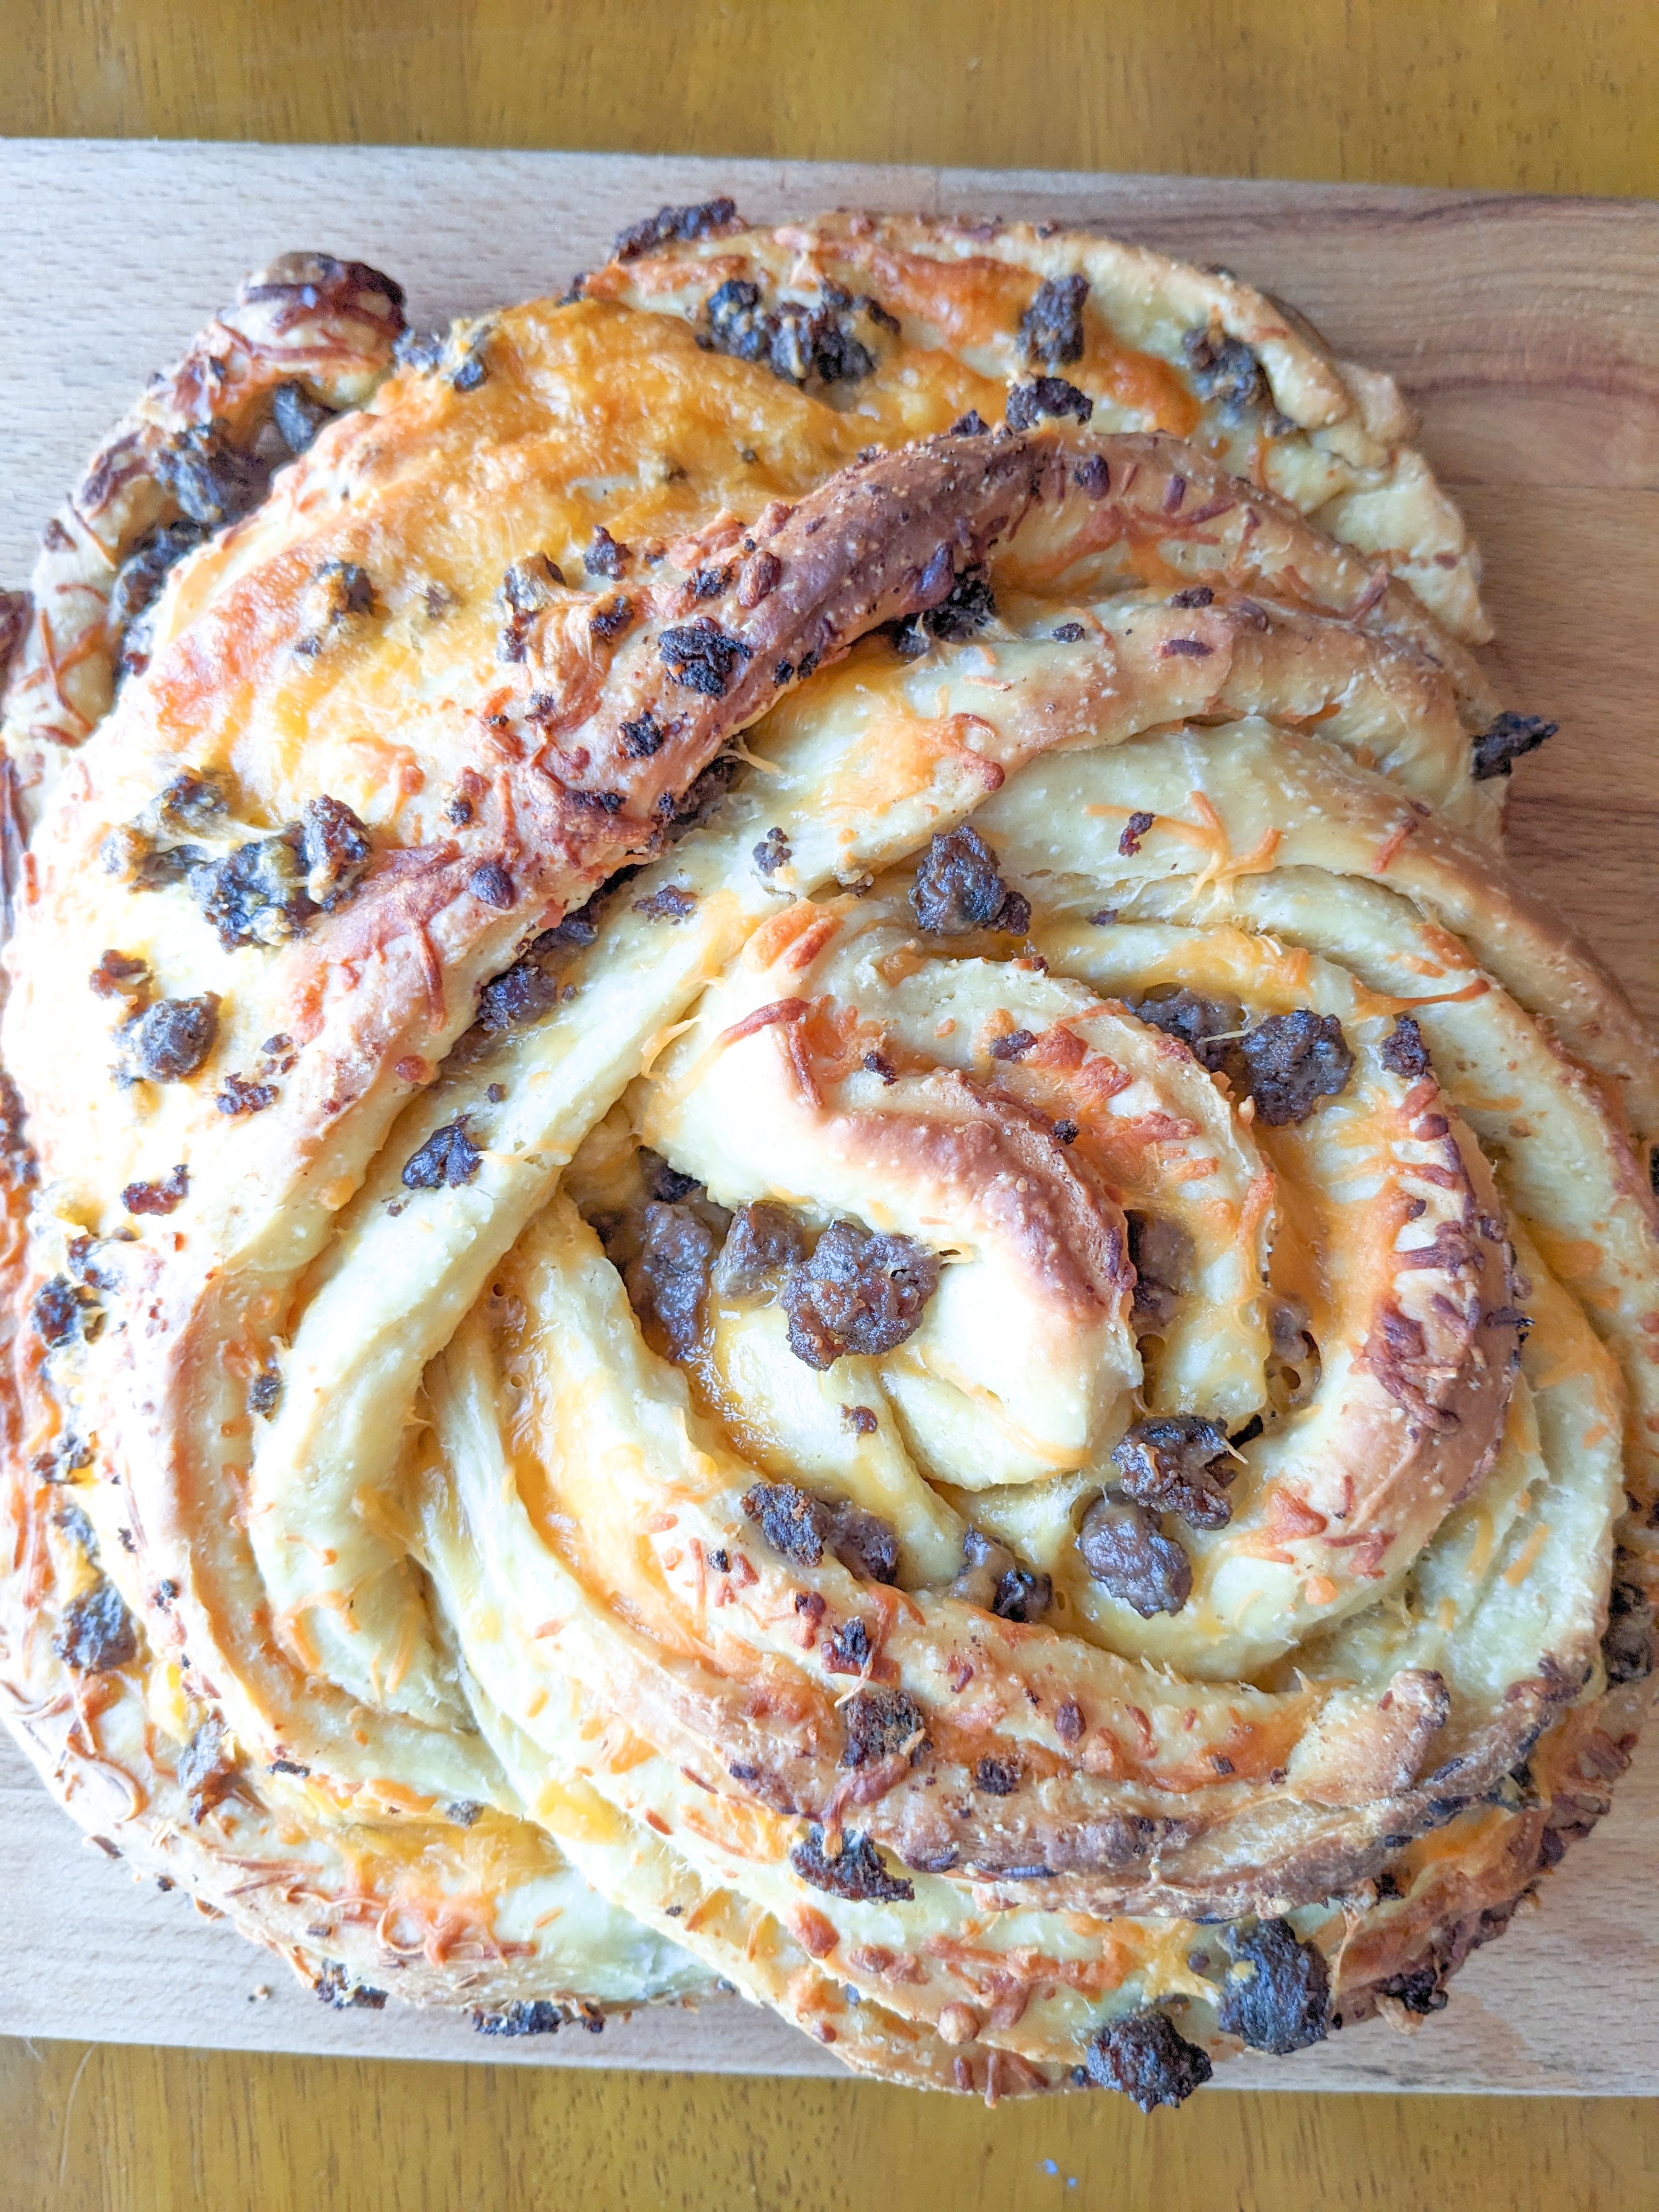
Once the dough has risen, transfer the dough to an unfloured work surface and press to deflate. Roll the dough into an 18×12-inch rectangle with the long side parallel to the counter’s edge. Distribute the shredded cheddar cheese and pork sausage evenly over the dough, leaving a 1-inch border around the edge. Starting with the edge closest to you, roll the dough into a log, pinching the ends and seam to seal. Starting about an inch away from one end of the log, using a pastry scraper or serrated knife, cut the log of dough length-wise down the middle, allowing the bread to fall open, revealing the sausage and cheddar layers on the inside. Now take the two long halves of the bread log, and twist them together. Do this by carefully lifting one side over the other and repeating until a braid has formed. Now pull the two ends together to form the dough into a circle, carefully tucking the ends inside the circle. Place the bread into a greased cast iron skillet. Cover loosely with a kitchen towel and allow to rise in a warm place until doubled in size, 1 to 1.5 hours. Preheat the oven to 350°F. Uncover your bread, and sprinkle the top with red pepper flakes. Place the cast iron skillet in the oven and bake for 25 minutes. Loosely cover the loaf with aluminum foil and bake for another 25-30 minutes. Let the loaf cool for a couple of minutes before placing on a wire rack. Cool for 30 minutes before slicing. This bread can be served warm or at room temperature. I hope you enjoy ♥
Sausage Cheddar Bread
Ingredients:
- 3 ¼ cup all-purpose flour
- ¼ cup granulated sugar
- 1 tbsp instant rapid-rise yeast
- 1 ½ tsp red pepper flakes
- 1 ¼ tsp salt
- ½ cup warm water (110°F)
- 2 eggs
- 1 egg yolk
- 4 tbsp unsalted butter, melted
- 2 cups shredded cheddar cheese
- ½ pound pork sausage
Directions:
- In the bowl of a stand mixer, whisk together the flour, sugar, yeast, red pepper flakes, and salt.
- In a liquid measuring cup, whisk together the warm water, eggs, egg yolk, and melted butter.
- Add the egg mixture to the flour mixture in the mixing bowl.
- Using a dough hook, knead on medium speed until the dough clears the bottom and sides of the bowl, about 4-8 minutes.
- Shape the dough into a ball and transfer to a greased bowl, turning the dough to coat the dough.
- Cover the bowl with plastic wrap and let the dough rise in a warm place until doubled in size, 1.5-2 hours.
- While the dough is rising, brown your pork sausage in a cast iron skillet. Add salt, pepper, and red pepper flakes to taste. Drain the grease and allow the pork sausage to cool.
- Once the dough has risen, transfer the dough to an unfloured work surface and press to deflate.
- Roll the dough into an 18×12-inch rectangle with the long side parallel to the counter’s edge.
- Distribute the shredded cheddar cheese and pork sausage evenly over the dough, leaving a 1-inch border around the edge.
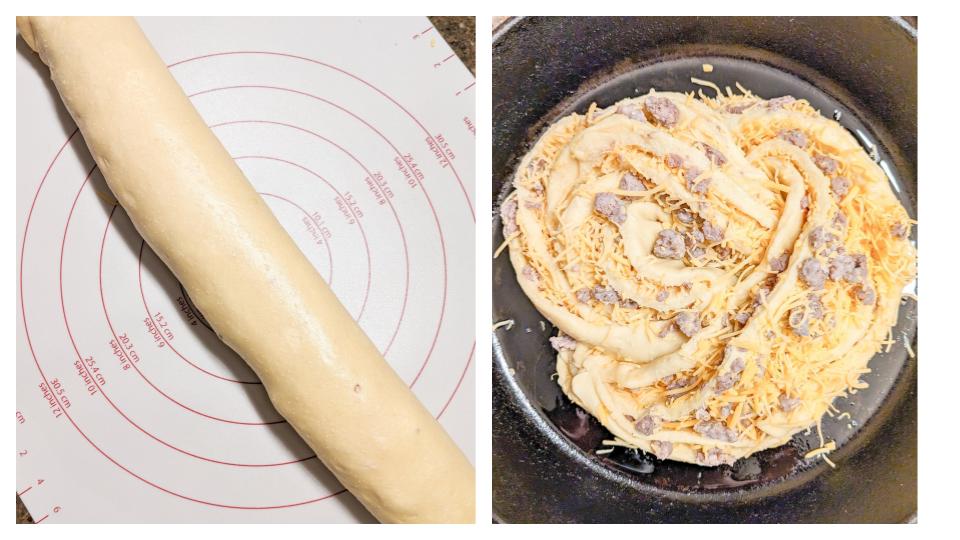
- Starting with the edge closest to you, roll the dough into a log, pinching the ends and seam to seal.
- Starting about an inch away from one end of the log, using a pastry scraper or serrated knife, cut the log of dough lengthwise down the middle, allowing the bread to fall open, revealing the sausage and cheddar layers on the inside.
- Now take the two long halves of the bread log, and twist them together. Do this by carefully lifting one side over the other and repeating until a braid has formed.
- Pull the two ends together to form the dough into a circle, carefully tucking the ends inside the circle.
- Place the bread into a greased cast iron skillet. Cover loosely with a kitchen towel and allow to rise in a warm place until doubled in size, 1 to 1.5 hours.
- Preheat the oven to 350°F.
- Uncover your bread, and sprinkle the top with red pepper flakes.
- Place the cast iron skillet in the oven and bake for 25 minutes.
- Loosely cover the loaf with aluminum foil and bake for another 25-30 minutes.
- Let the loaf cool for a couple of minutes before placing on a wire rack. Cool for 30 minutes before slicing. This bread can be served warm or at room temperature.
Notes:
- To make the bread the day before, follow steps 1-15. Instead of covering with a towel, cover with plastic wrap and place the cast iron skillet in the fridge overnight. Before baking in the morning, remove the skillet from the fridge and allow the bread to warm up to room temperature, about 1-1.5 hours. Follow steps 16-20 for baking.
-
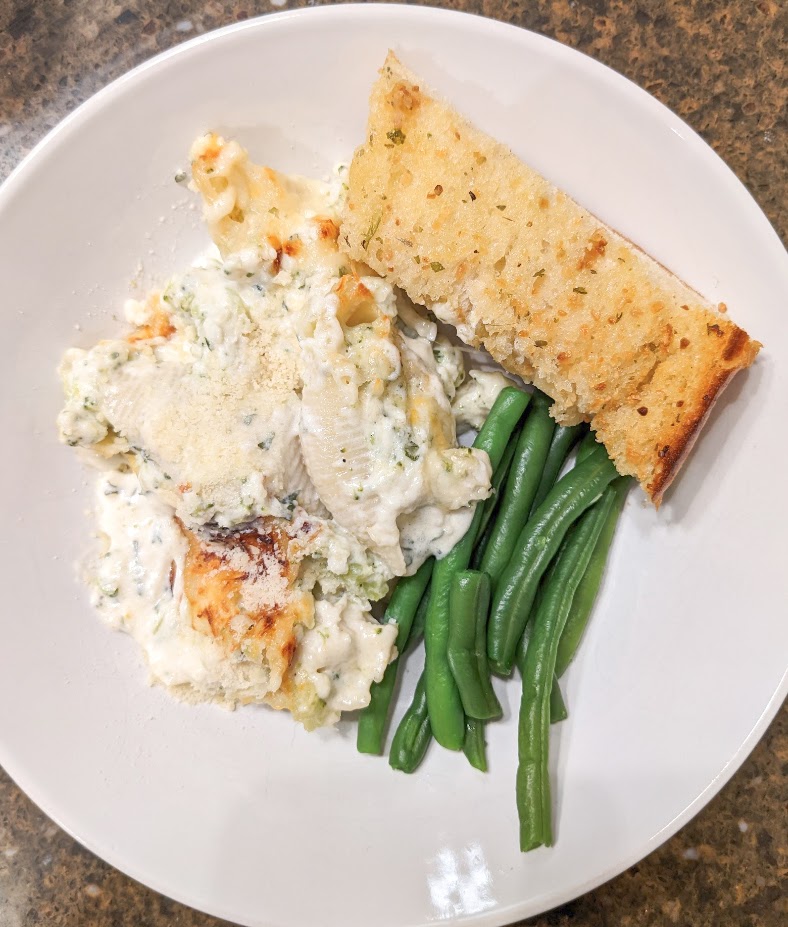
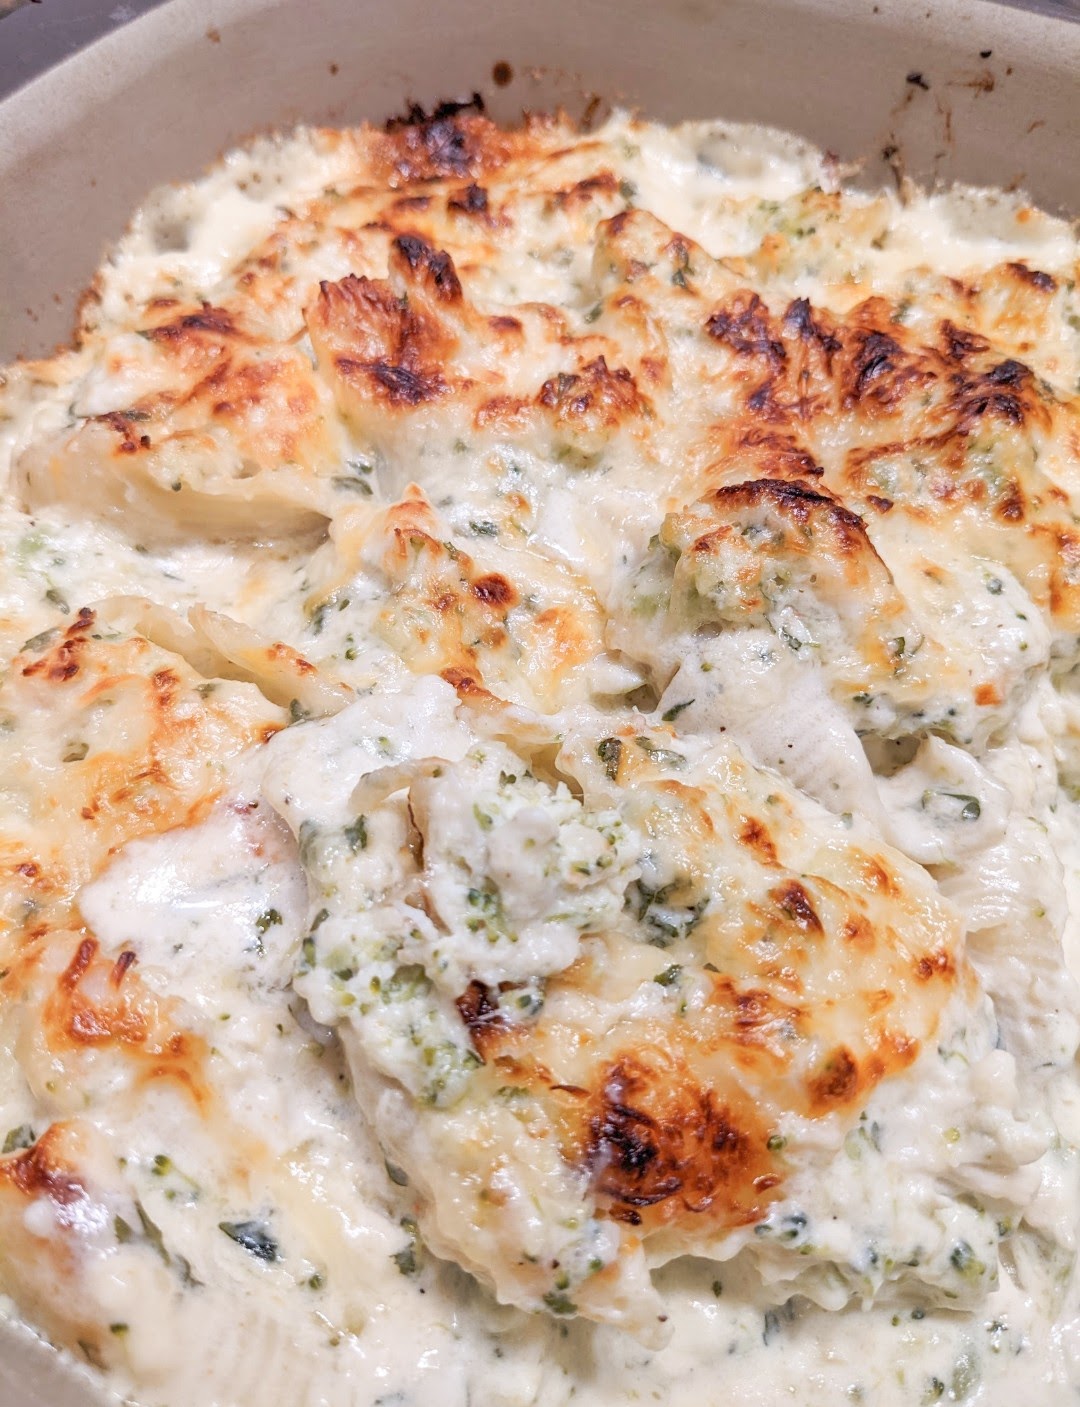
Chicken Broccoli Alfredo Stuffed Shells
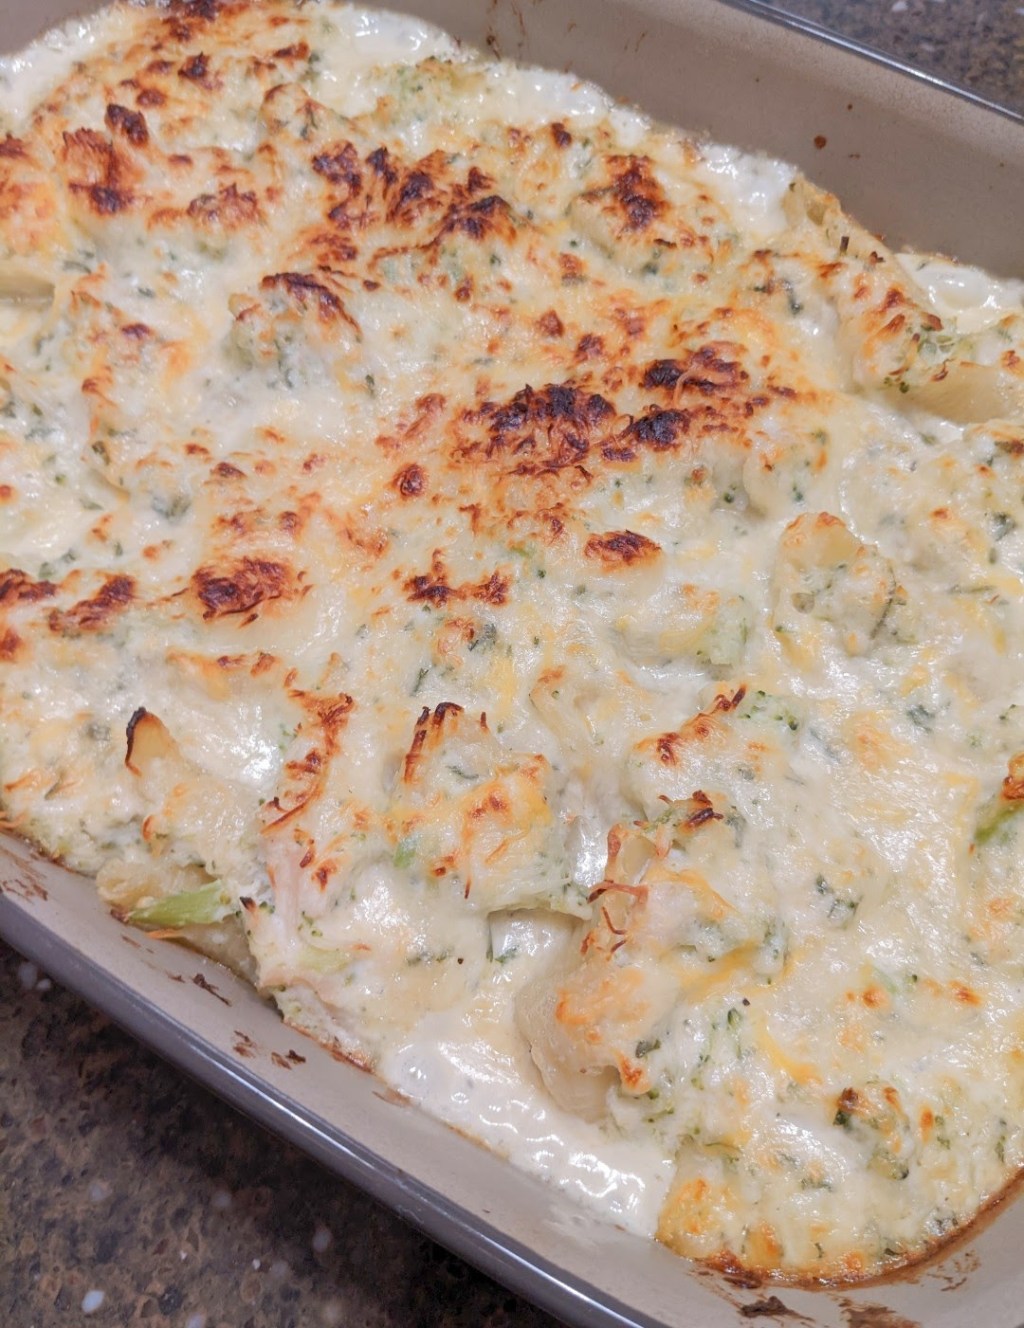
I’m always searching for recipes that my kids will eat. It is tough to find recipes that my whole family will enjoy. So I came up with this chicken broccoli alfredo stuffed shell recipe. This recipe combines all things tasty. Hearty noodles, with creamy alfredo sauce, some color and nutrition with the steamed broccoli, shredded chicken for some protein, and of course, to make my kids happy, lots of cheese. This meal is easy to throw together with store bought ingredients for a quick, hearty, weeknight meal. You can also make it from scratch…either way, it is sure to satisfy everyone’s tastebuds.
Ingredients:
- Box of Jumbo Shells
- Cooked, shredded chicken – Some local grocery stores, or costco, sells pre-cooked and shredded rotisserie chicken. You can always buy a rotisserie chicken and shred it yourself. Or cook up some chicken breasts at home and shred them for this meal.
- Garlic powder
- Salt
- Pepper
- Steamed Broccoli, either fresh or frozen.
- Alfredo Sauce – a jar bought from the store or whip up some homemade alfredo sauce at home. I highly recommend taking the extra step to make homemade alfredo sauce. It is pretty quick and easy to make and is so much tastier than store bought. If you are making your own alfredo sauce, you will also need butter, minced garlic, and heavy cream.
- Mozzarella Cheese
- Parmesan Cheese
- Parsley
Let’s Bake:
Cook the pasta according to the package directions, until pasta is al dente. Drain water and lay out the shells on a large cookie sheet lined with parchment paper and allow to cool completely. Next, get started on your alfredo sauce. In a saucepan over medium heat, melt the butter. Once the butter is melted, add the minced garlic and saute for 30-60 seconds. Slowly add the heavy cream while stirring. Season with salt and pepper. Let the cream cook for 2-3 minutes just until it starts to bubble around the edges, but do not let the cream come to a boil. Reduce the heat to medium low and add the parmesan cheese. Stir while adding until the cheese is melted in. Finish your alfredo by adding some fresh or dried parsley.
While assembling your stuffed shells, preheat your oven to 350°F. In a mixing bowl, combine the shredded chicken, steamed broccoli, garlic powder, salt, pepper, and 1 cup of alfredo sauce. Mix together. In a 9×13-inch baking pan, add a spoonful of alfredo sauce and coat the bottom of the pan. Fill the shells with a spoonful of chicken and broccoli mixture and place the stuffed shells in the pan as you go. This doesn’t need to be fancy or organized, you can stuff as many shells as you can into the pan. Pour the remaining alfredo sauce over the stuffed shells. Sprinkle the top with mozzarella and parmesan cheese. Bake, uncovered, for 25 minutes, or until warm and bubbly. I like to turn on the broiler for 1-2 minutes at the end of baking to crisp up the cheese a little and give your dish a nice golden color. Allow to cool for a few minutes, serve and enjoy ♥

Chicken Broccoli Alfredo Stuffed Shells

Ingredients:
- 1 Box of Jumbo Shells (12 oz)
- 2 cups cooked, shredded chicken
- ¼ tsp garlic powder
- ½ tsp salt
- ¼ tsp pepper
- 12 oz steamed Broccoli (either fresh or frozen)
- Alfredo sauce (1-16 oz jar or homemade- see recipe below)
- 1 cup shredded mozzarella cheese
- ½ cup grated parmesan cheese
Alfredo Sauce
- 6 tbsp salted butter
- 4 cloves garlic, minced
- 2 cups heavy cream
- 1 tsp salt
- 1 cup grated parmesan cheese
- ¼ tsp pepper
- 1 tbsp chopped parsley
Directions:
- Cook the pasta according to the package directions, until pasta is al dente.
- Drain water and lay out the shells on a large cookie sheet lined with parchment paper. Allow to cool completely.
- Alfredo sauce:
- In a saucepan over medium heat, melt the butter.
- Add the minced garlic and saute for 30-60 seconds.
- Slowly add the heavy cream while stirring.
- Season with salt and pepper.
- Cook the cream for 2-3 minutes just until it starts to bubble around the edges, but do not let the cream come to a boil.
- Reduce the heat to medium low and add the parmesan cheese. Stir while adding until the cheese is melted in.
- Add parsley.
- Preheat your oven to 350°F.
- In a mixing bowl, combine the shredded chicken, steamed broccoli, garlic powder, salt, pepper, and 1 cup of alfredo sauce. Mix together.
- In a 9×13-inch baking pan, add a spoonful of alfredo sauce and coat the bottom of the pan.
- Fill the shells with a spoonful of chicken and broccoli mixture and place the stuffed shells in the pan as you go.
- Pour the remaining alfredo sauce over the stuffed shells. Sprinkle the top with mozzarella and parmesan cheese.
- Bake, uncovered, for 25 minutes, or until warm and bubbly.
- Allow to cool for a few minutes, serve and enjoy.
Notes:
- To make ahead, follow steps through step 8. Cover with foil and refrigerate for up to a day before ready to bake.
-
Puff Pastry Bites
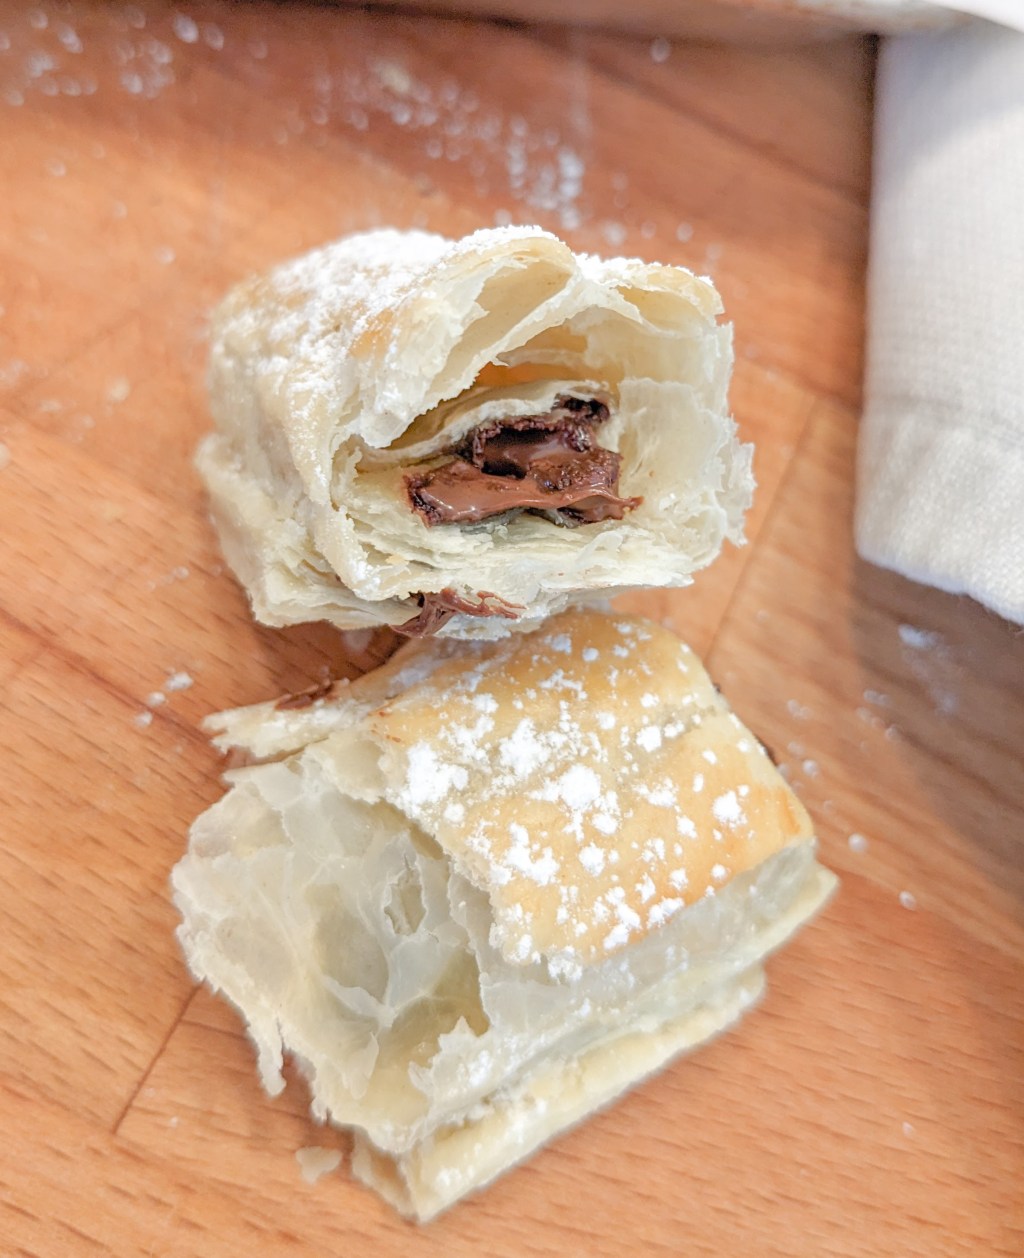
I am a HUGE fan of chocolate croissants. Those flaky, buttery, delicious pastries that just melt in your mouth. I love them…but I don’t really love the idea of making them. It just seems like a very tedious and challenging task. Homemade croissants take a lot of time and patience, which, as a mom of 3 little ones, I just don’t have. But what if I told you that I found a quick and easy way to make them at home in 30 minutes?! I’m serious. These little puff pastry bites are so good, and they don’t require much time or effort!
Ingredients:
- Puff Pastry Sheets
- Chocolate chips
- Egg
- Powdered Sugar
- Optional: Strawberry Jam and White Chocolate Chips
Let’s Bake:
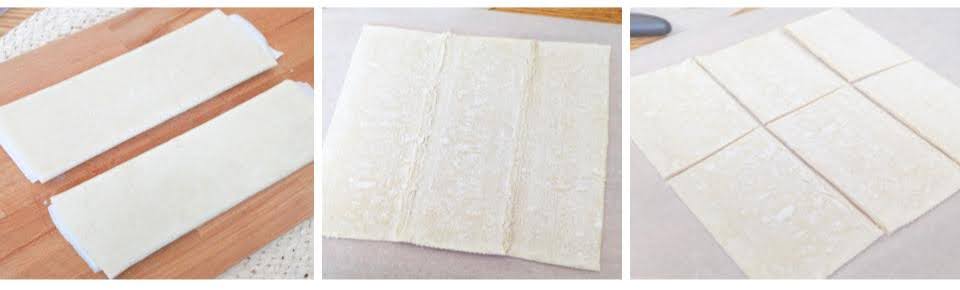
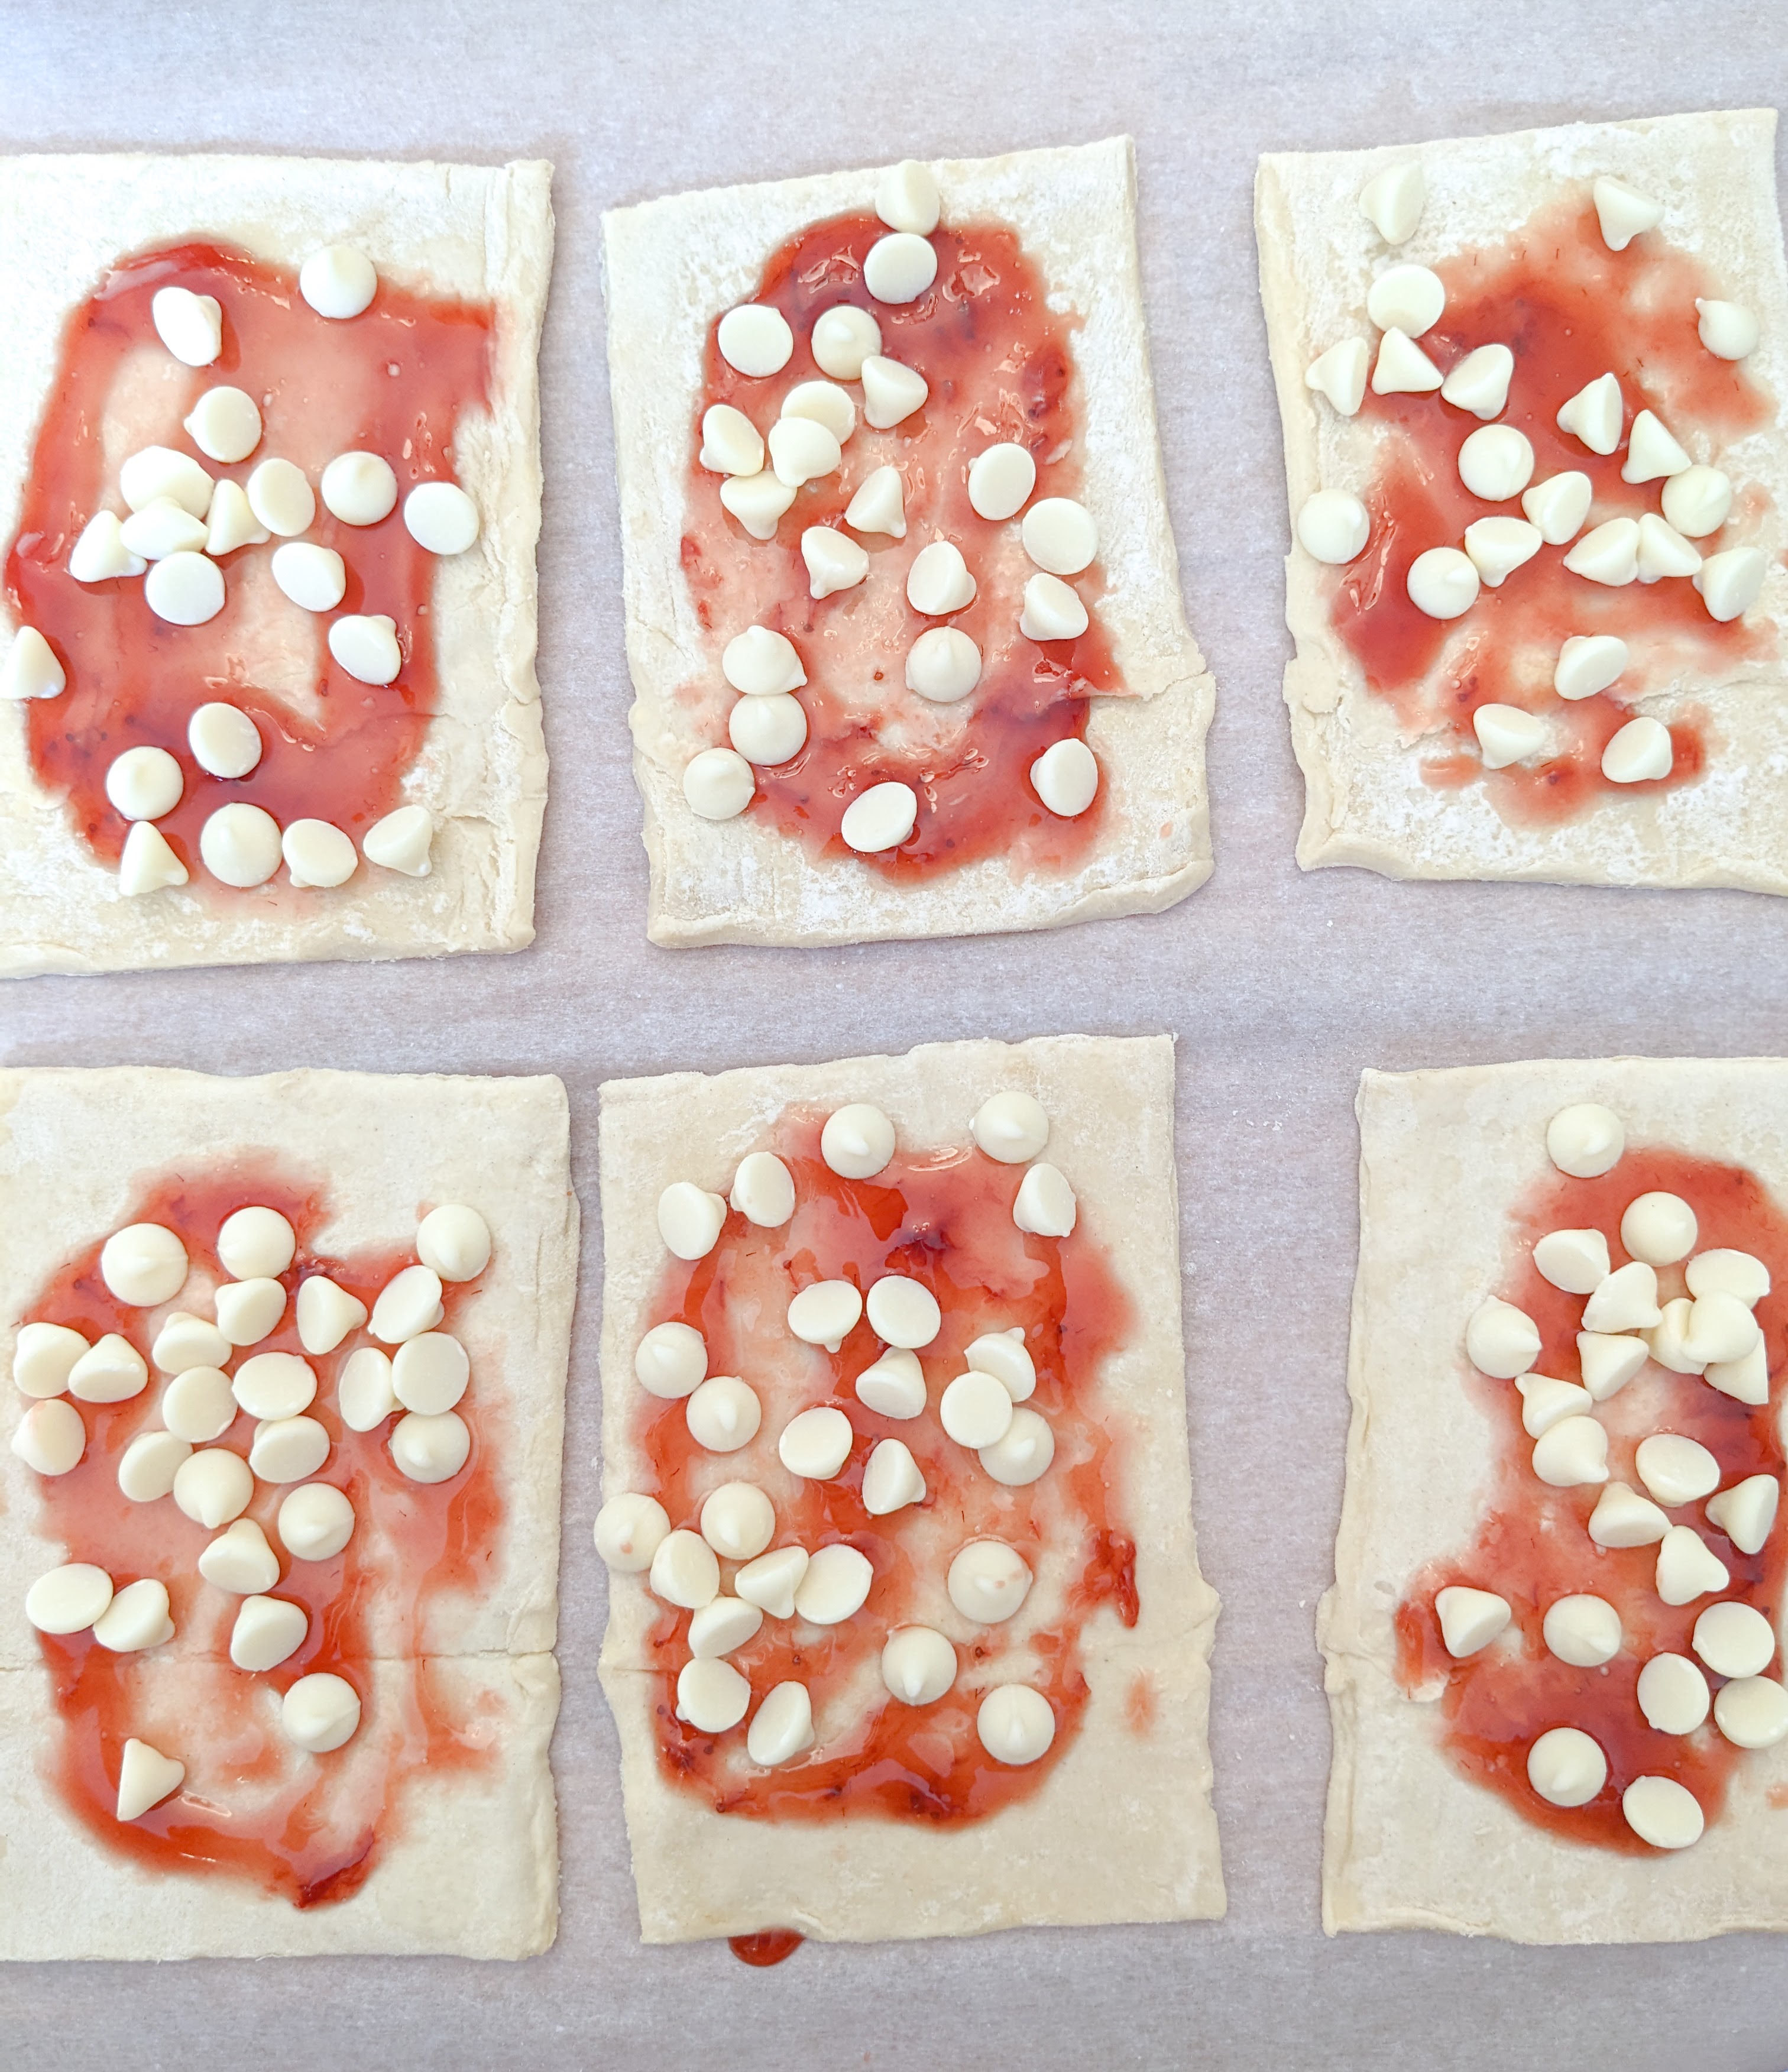
First, you need to pull your puff pastry sheets out of the freezer and allow them to thaw for 30 minutes and preheat your oven to 400°F. Prepare a baking sheet with parchment paper. Unfold the pastry sheet and cut the sheet into 6 pieces, about 3″ by 5″. To do this, use a pizza cutter and cut the sheet down the seam lines and then turn the sheet 90° and cut the sheet down the middle. After cutting boththe sheets, you should have 12 rectangles total.
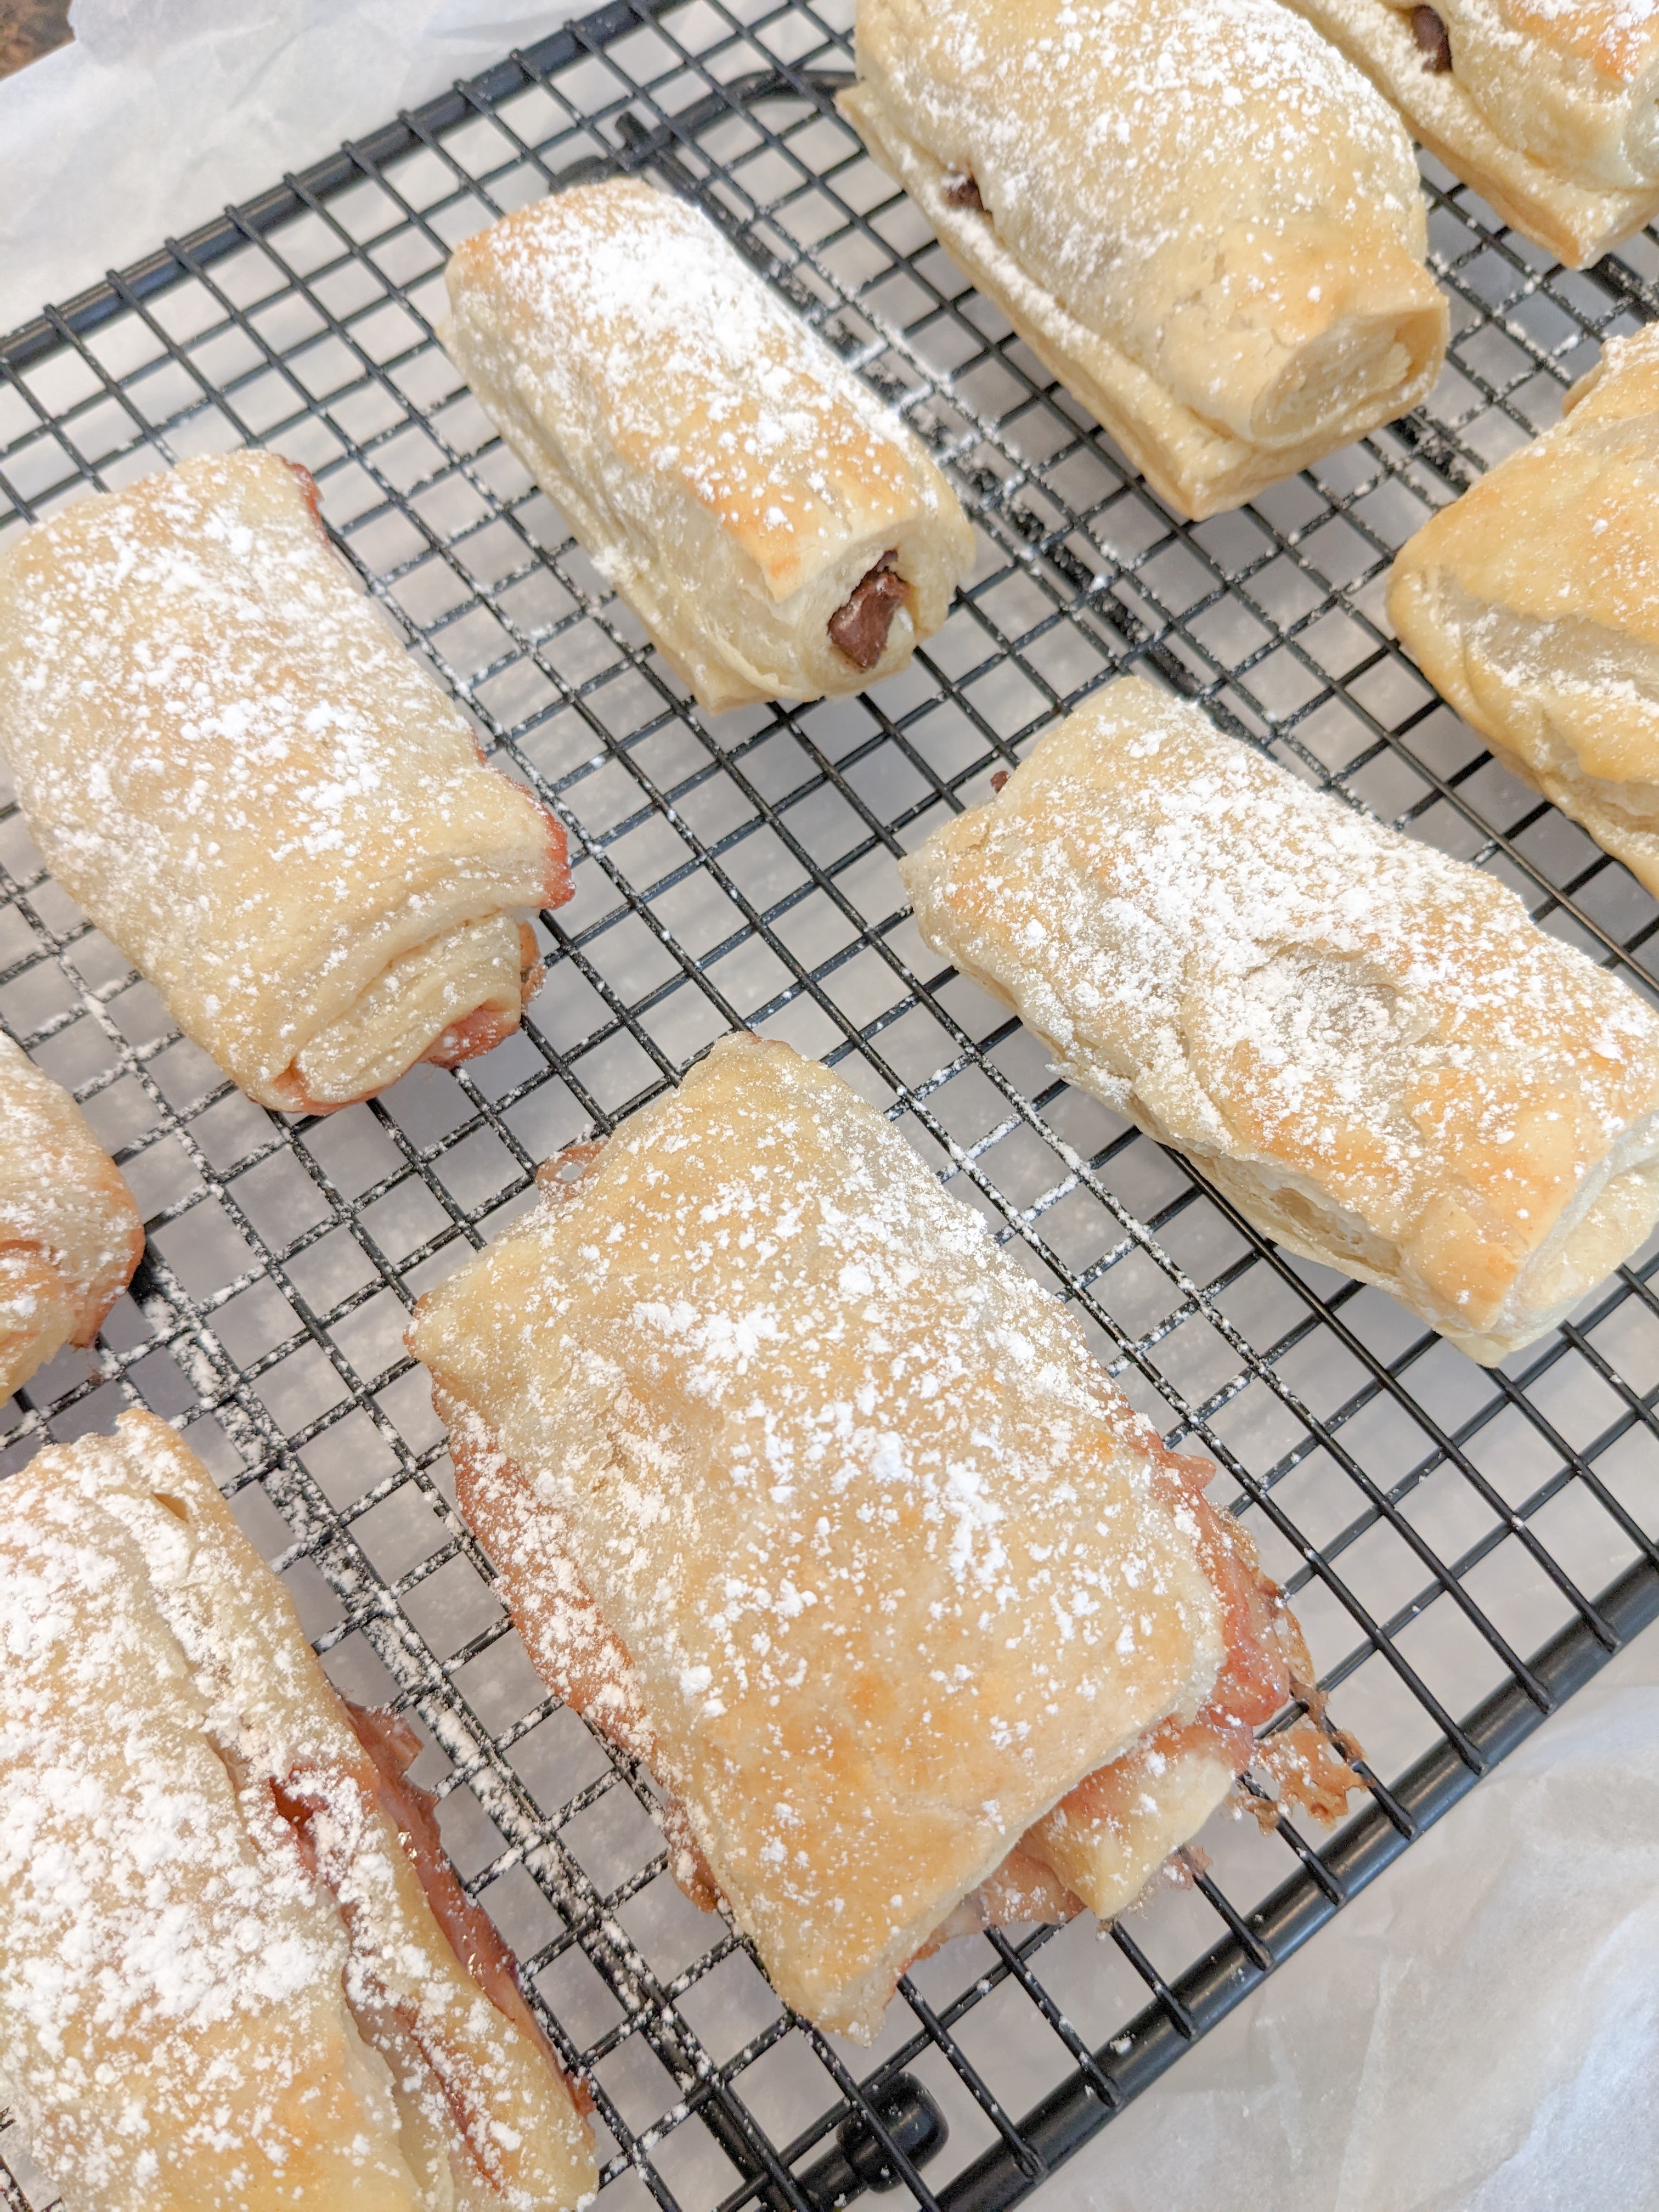
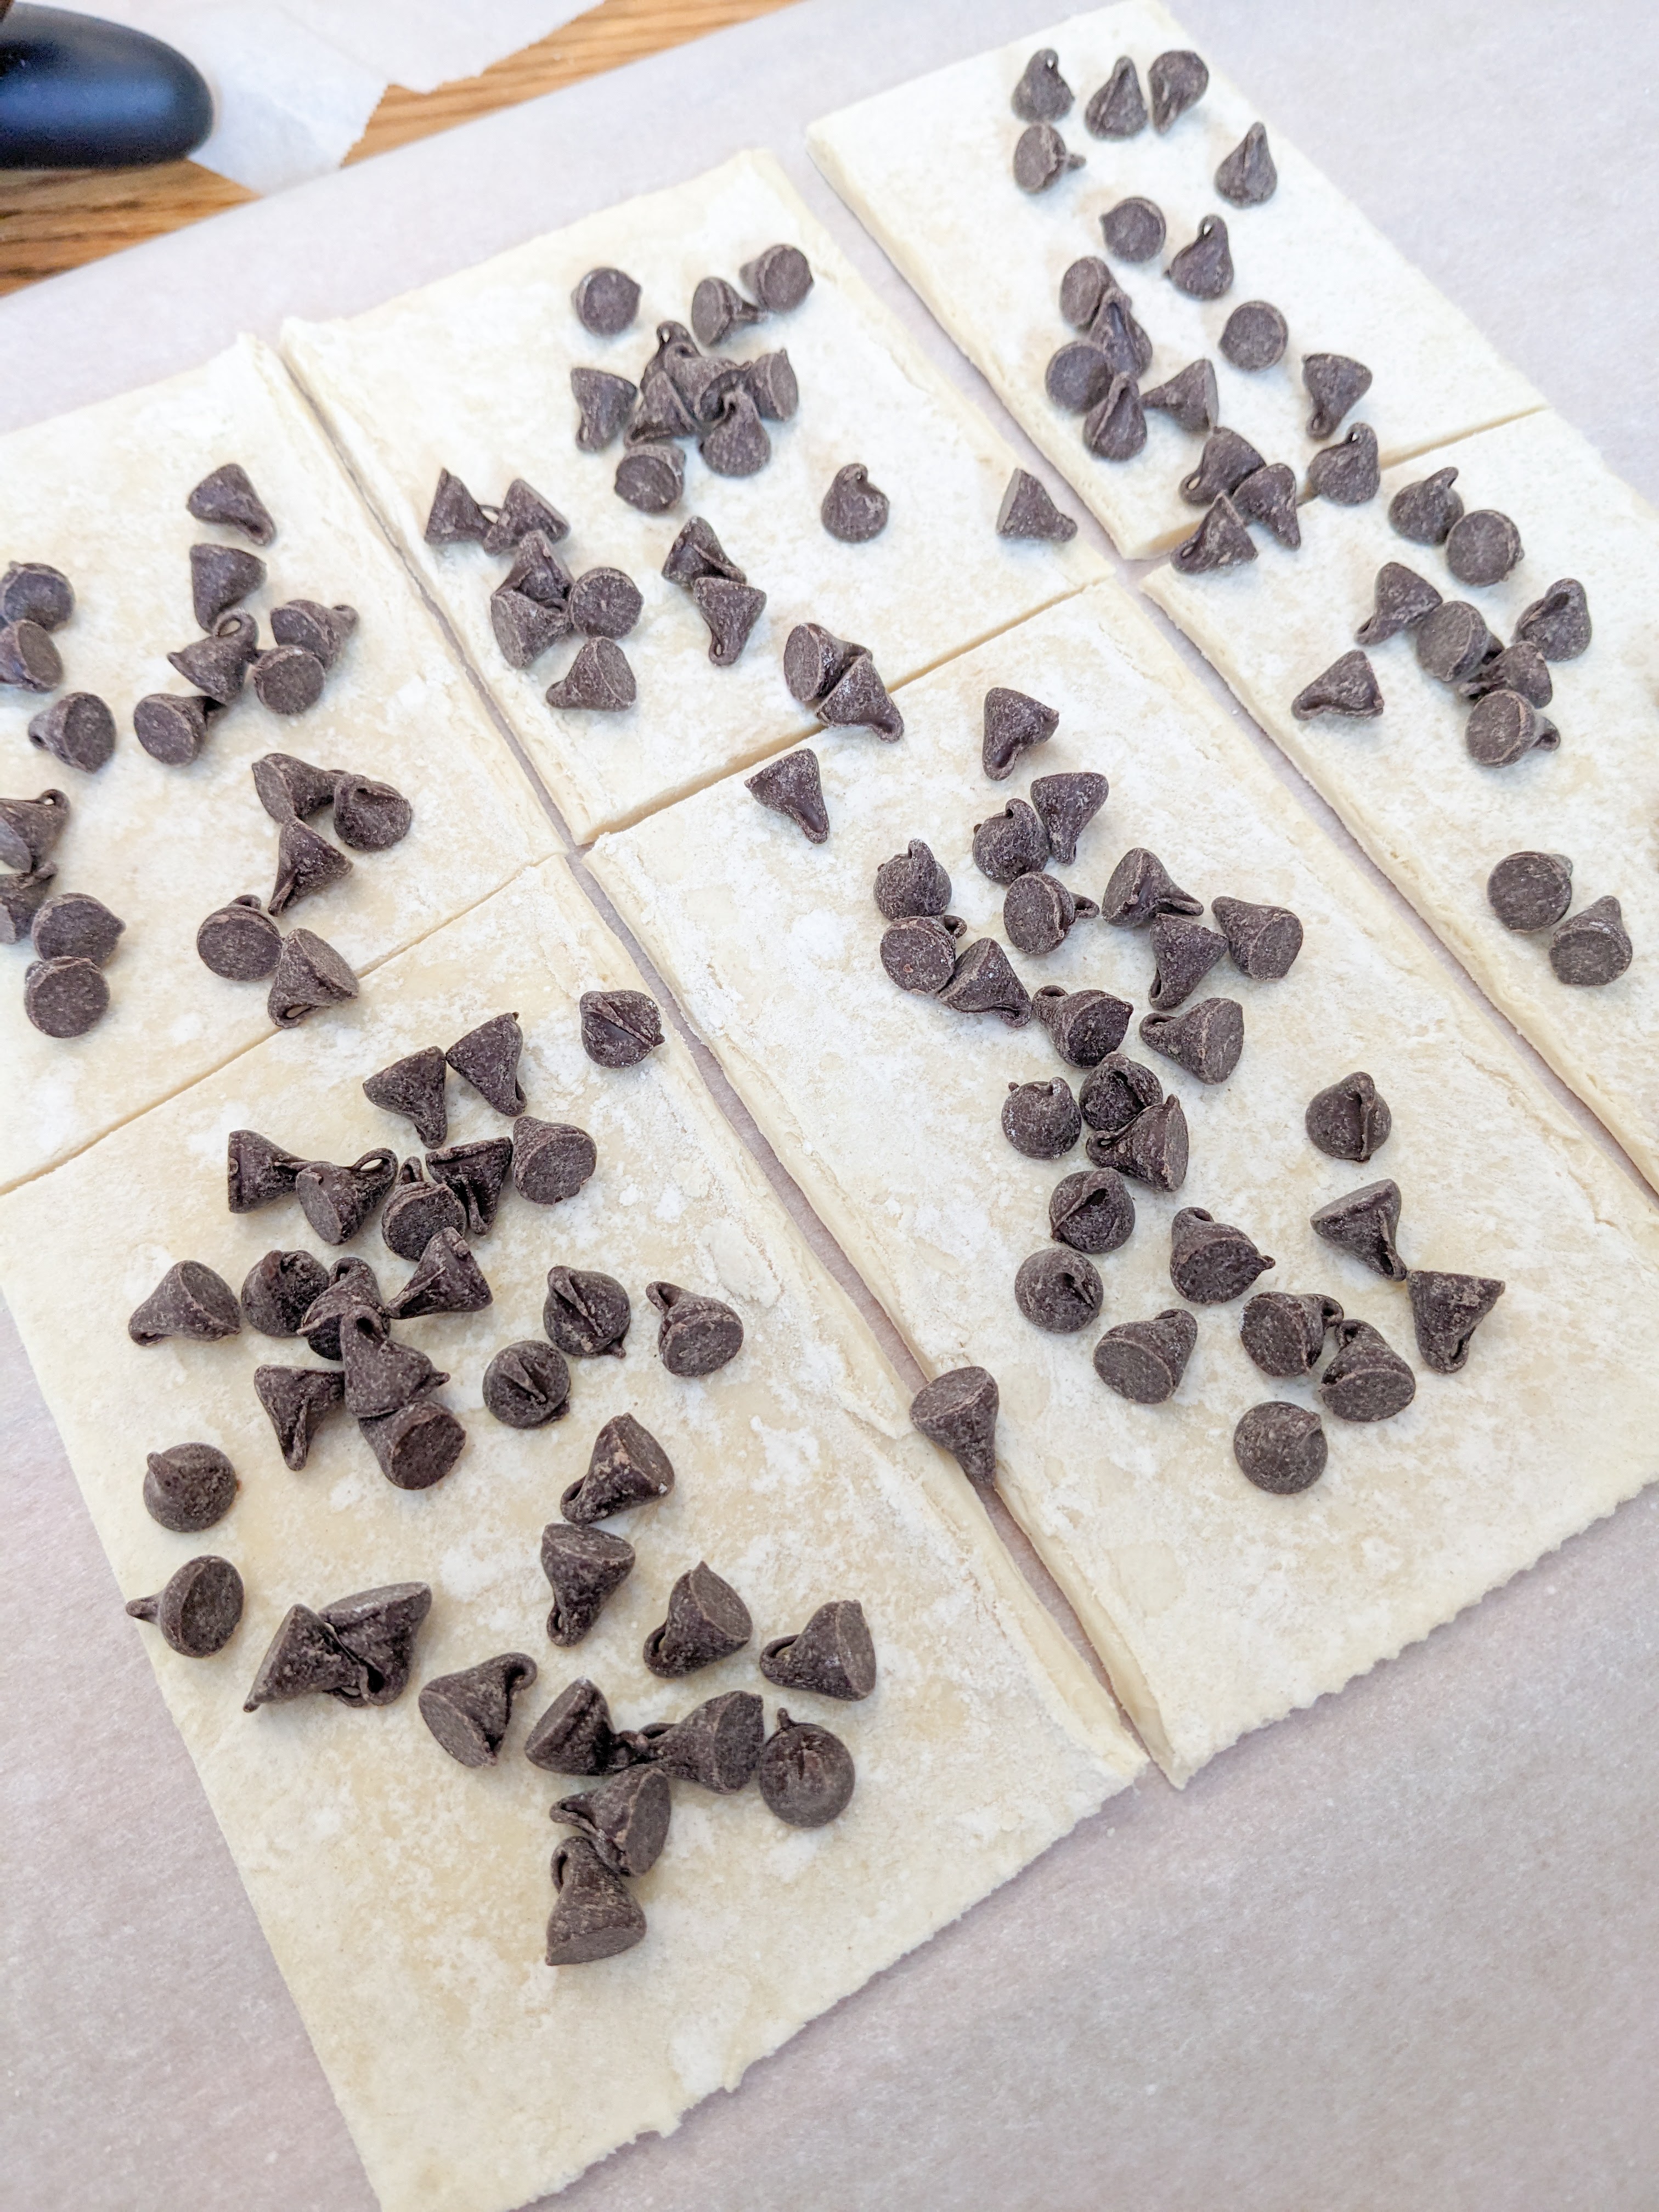
Sprinkle the chocolate chips over the pastry sheet. Roll each rectangle up, with the chocolate chips inside. Arrange the puff pastry evenly on the baking sheet with the seam side down. Make an egg wash by cracking an egg into a bowl and add a splash of water. Whisk the egg and then brush the egg wash on top of the puff pastry bites. Bake for about 20 minutes until they are golden brown. Remove from the oven and move to acooling rack. Allow the pastry bites to cool completely, and then dust with powdered sugar.
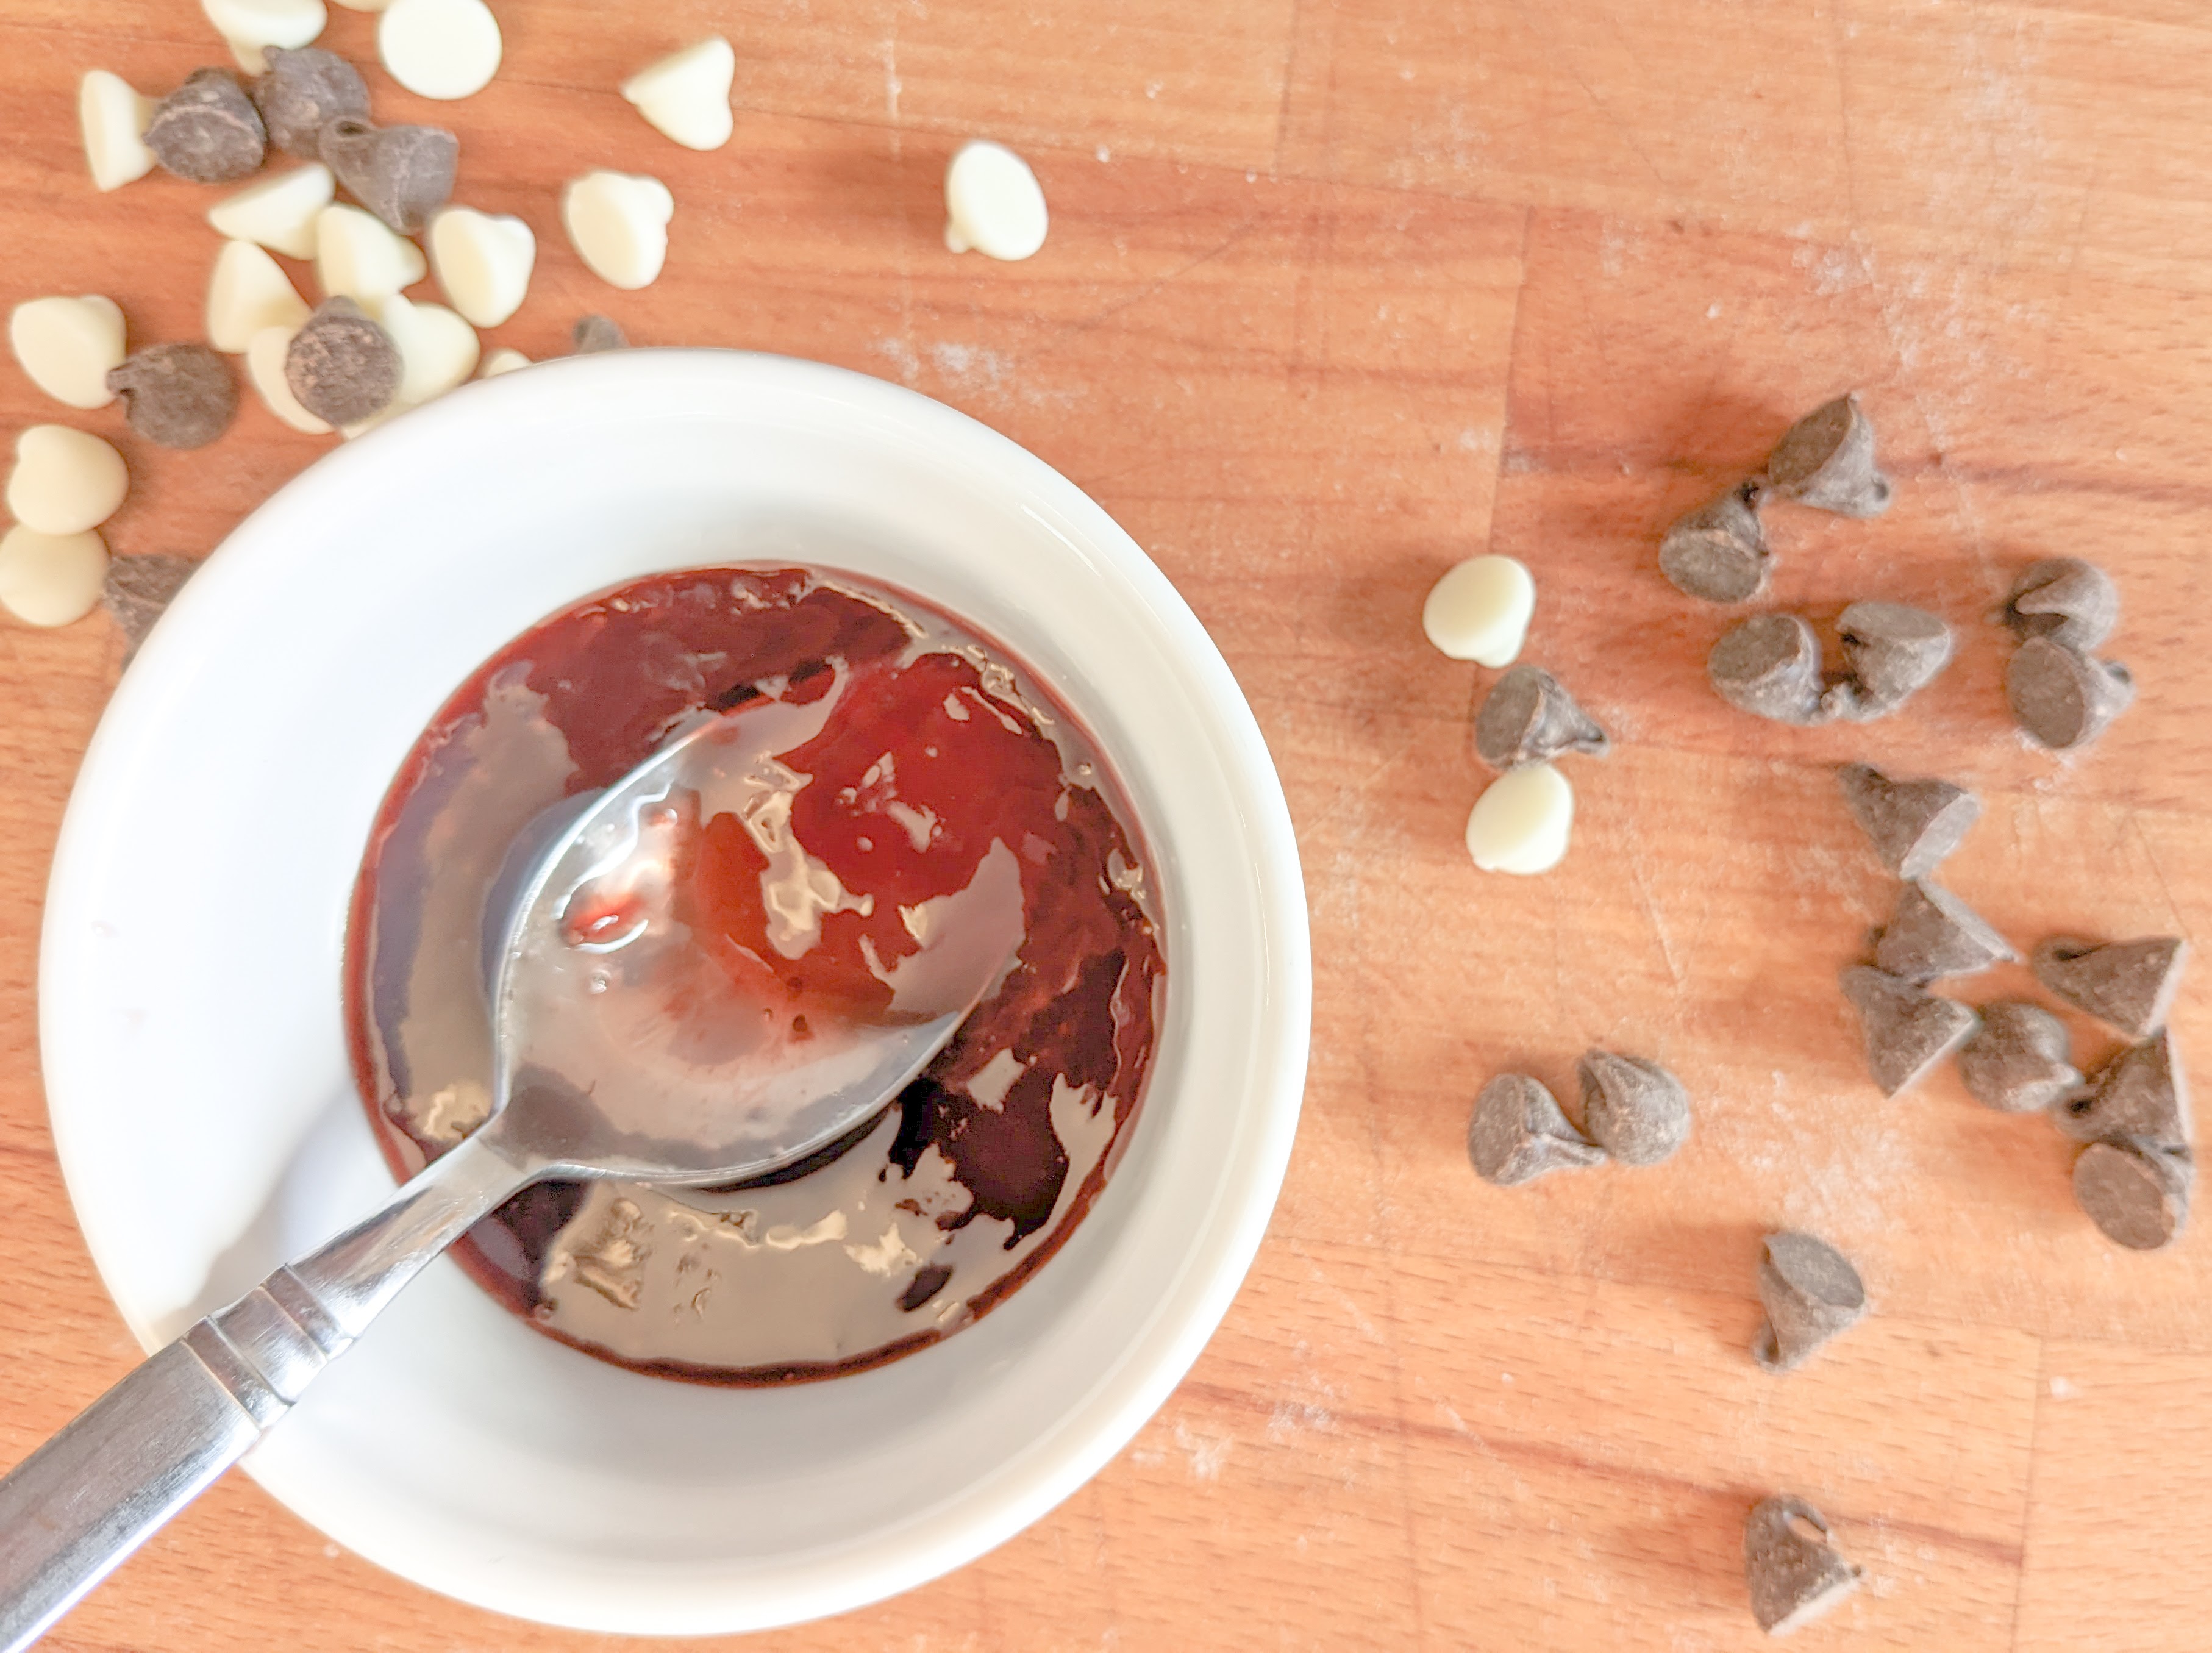
I also made a strawberry white chocolate version. I replaced the chocolate chips with about a tablespoon of strawberry jam and some white chocolate chips for each rectangle. These were so tasty, with a delicious jammy and chocolately center.
These are the perfect little treats for you and your loved ones, without a lot of time and effort. I hope you enjoy ♥

Puff Pastry Bites

Ingredients:
1 box frozen puff pastry sheets (2 sheets)
1 cup semisweet chocolate chips
1 large egg
¼ cup powdered sugar
Directions:
- Allow puff pastry sheets to thaw for 30 minutes.
- Preheat oven to 400℉. Prepare your baking sheet with a sheet of parchment paper.
- Unfold the pastry sheet and cut the sheet into 6 pieces, about 3″ by 5″. To do this, I used a pizza cutter and cut the sheet down the seam lines and then turned the sheet 90° and cut the sheet down the middle.
- Sprinkle the chocolate chips over the pastry sheet.
- Roll each rectangle up, with the chocolate chips inside.
- Arrange the puff pastry evenly on the baking sheet with the seam side down. Make an egg wash by cracking an egg into a bowl and adding a splash of water. Whisk the egg and then brush the egg wash on top of the puff pastry bites.
- Bake for about 20 minutes until they are golden brown.
- Remove from the oven and move to a cooling rack.
- Allow the pastry bites to cool completely, and then dust with powdered sugar.
Notes:
- A tasty variation is a strawberry white chocolate puff pastry bite. To make this, substitute the chocolate chips for strawberry jam and white chocolate chips. After cutting your puff pastry rectangles, spread about a tablespoon of strawberry jam on each rectangle and sprinkle with white chocolate chips.
-
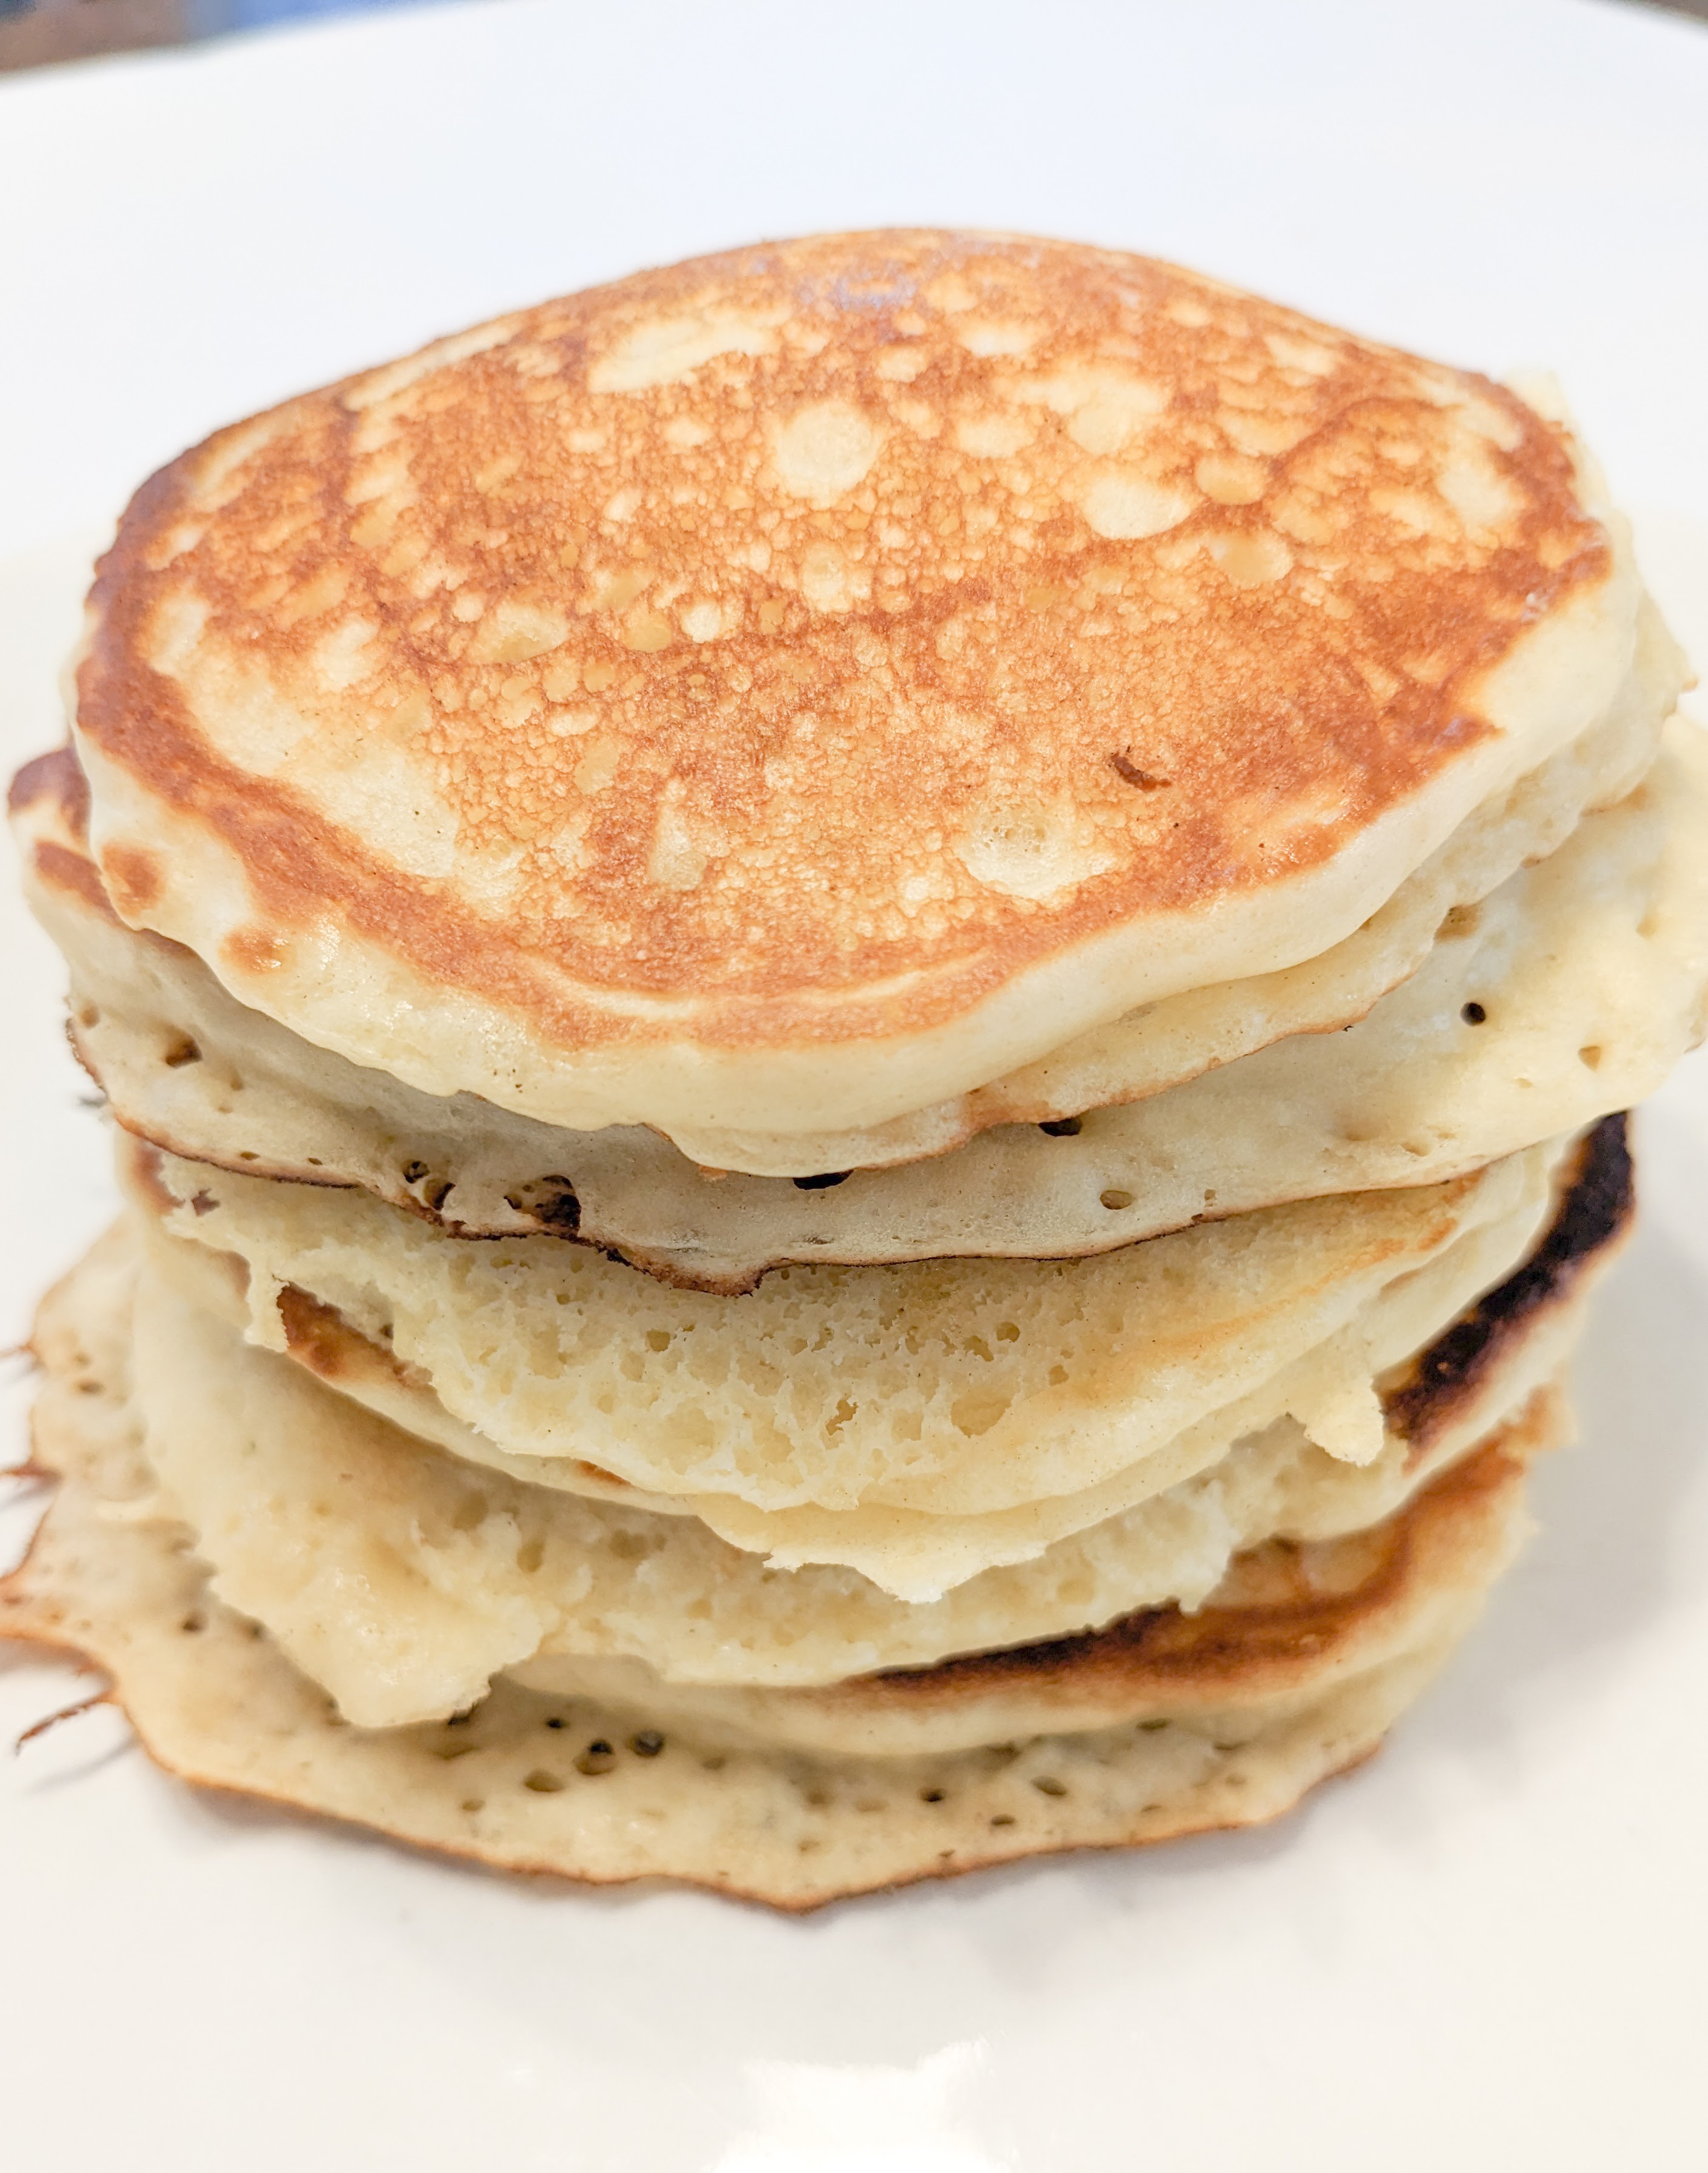
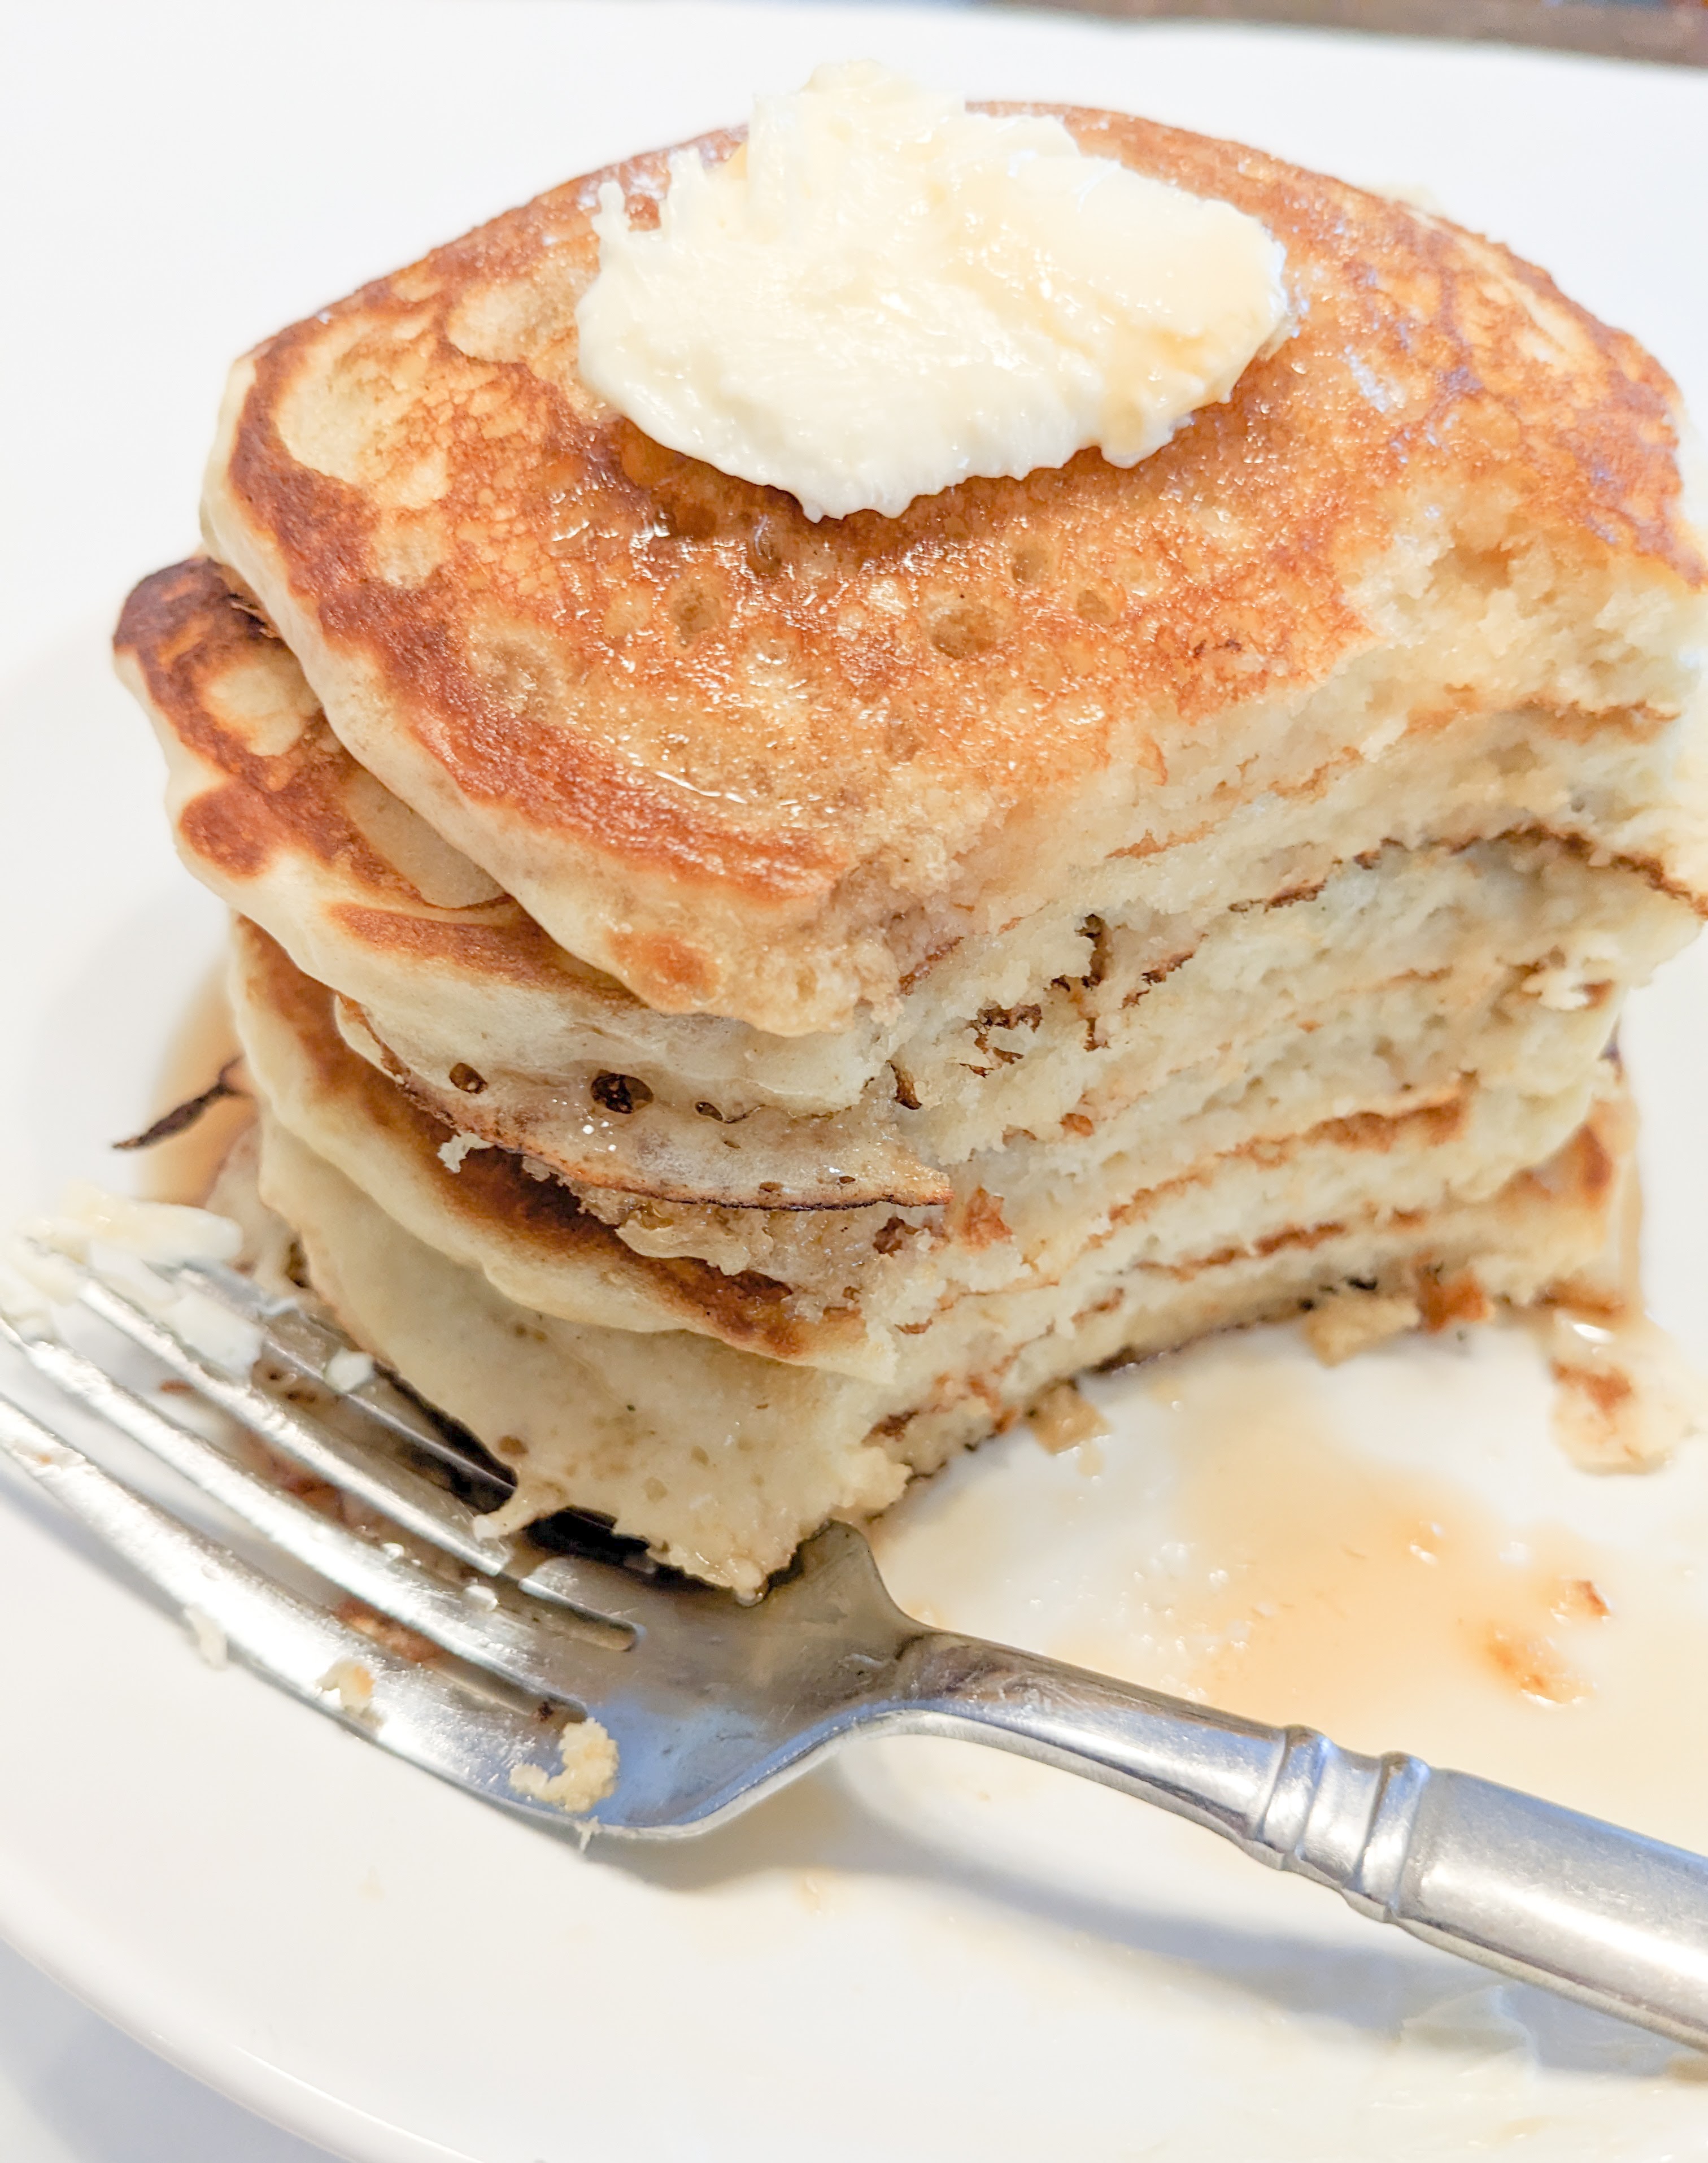
Easy Buttermilk Pancakes

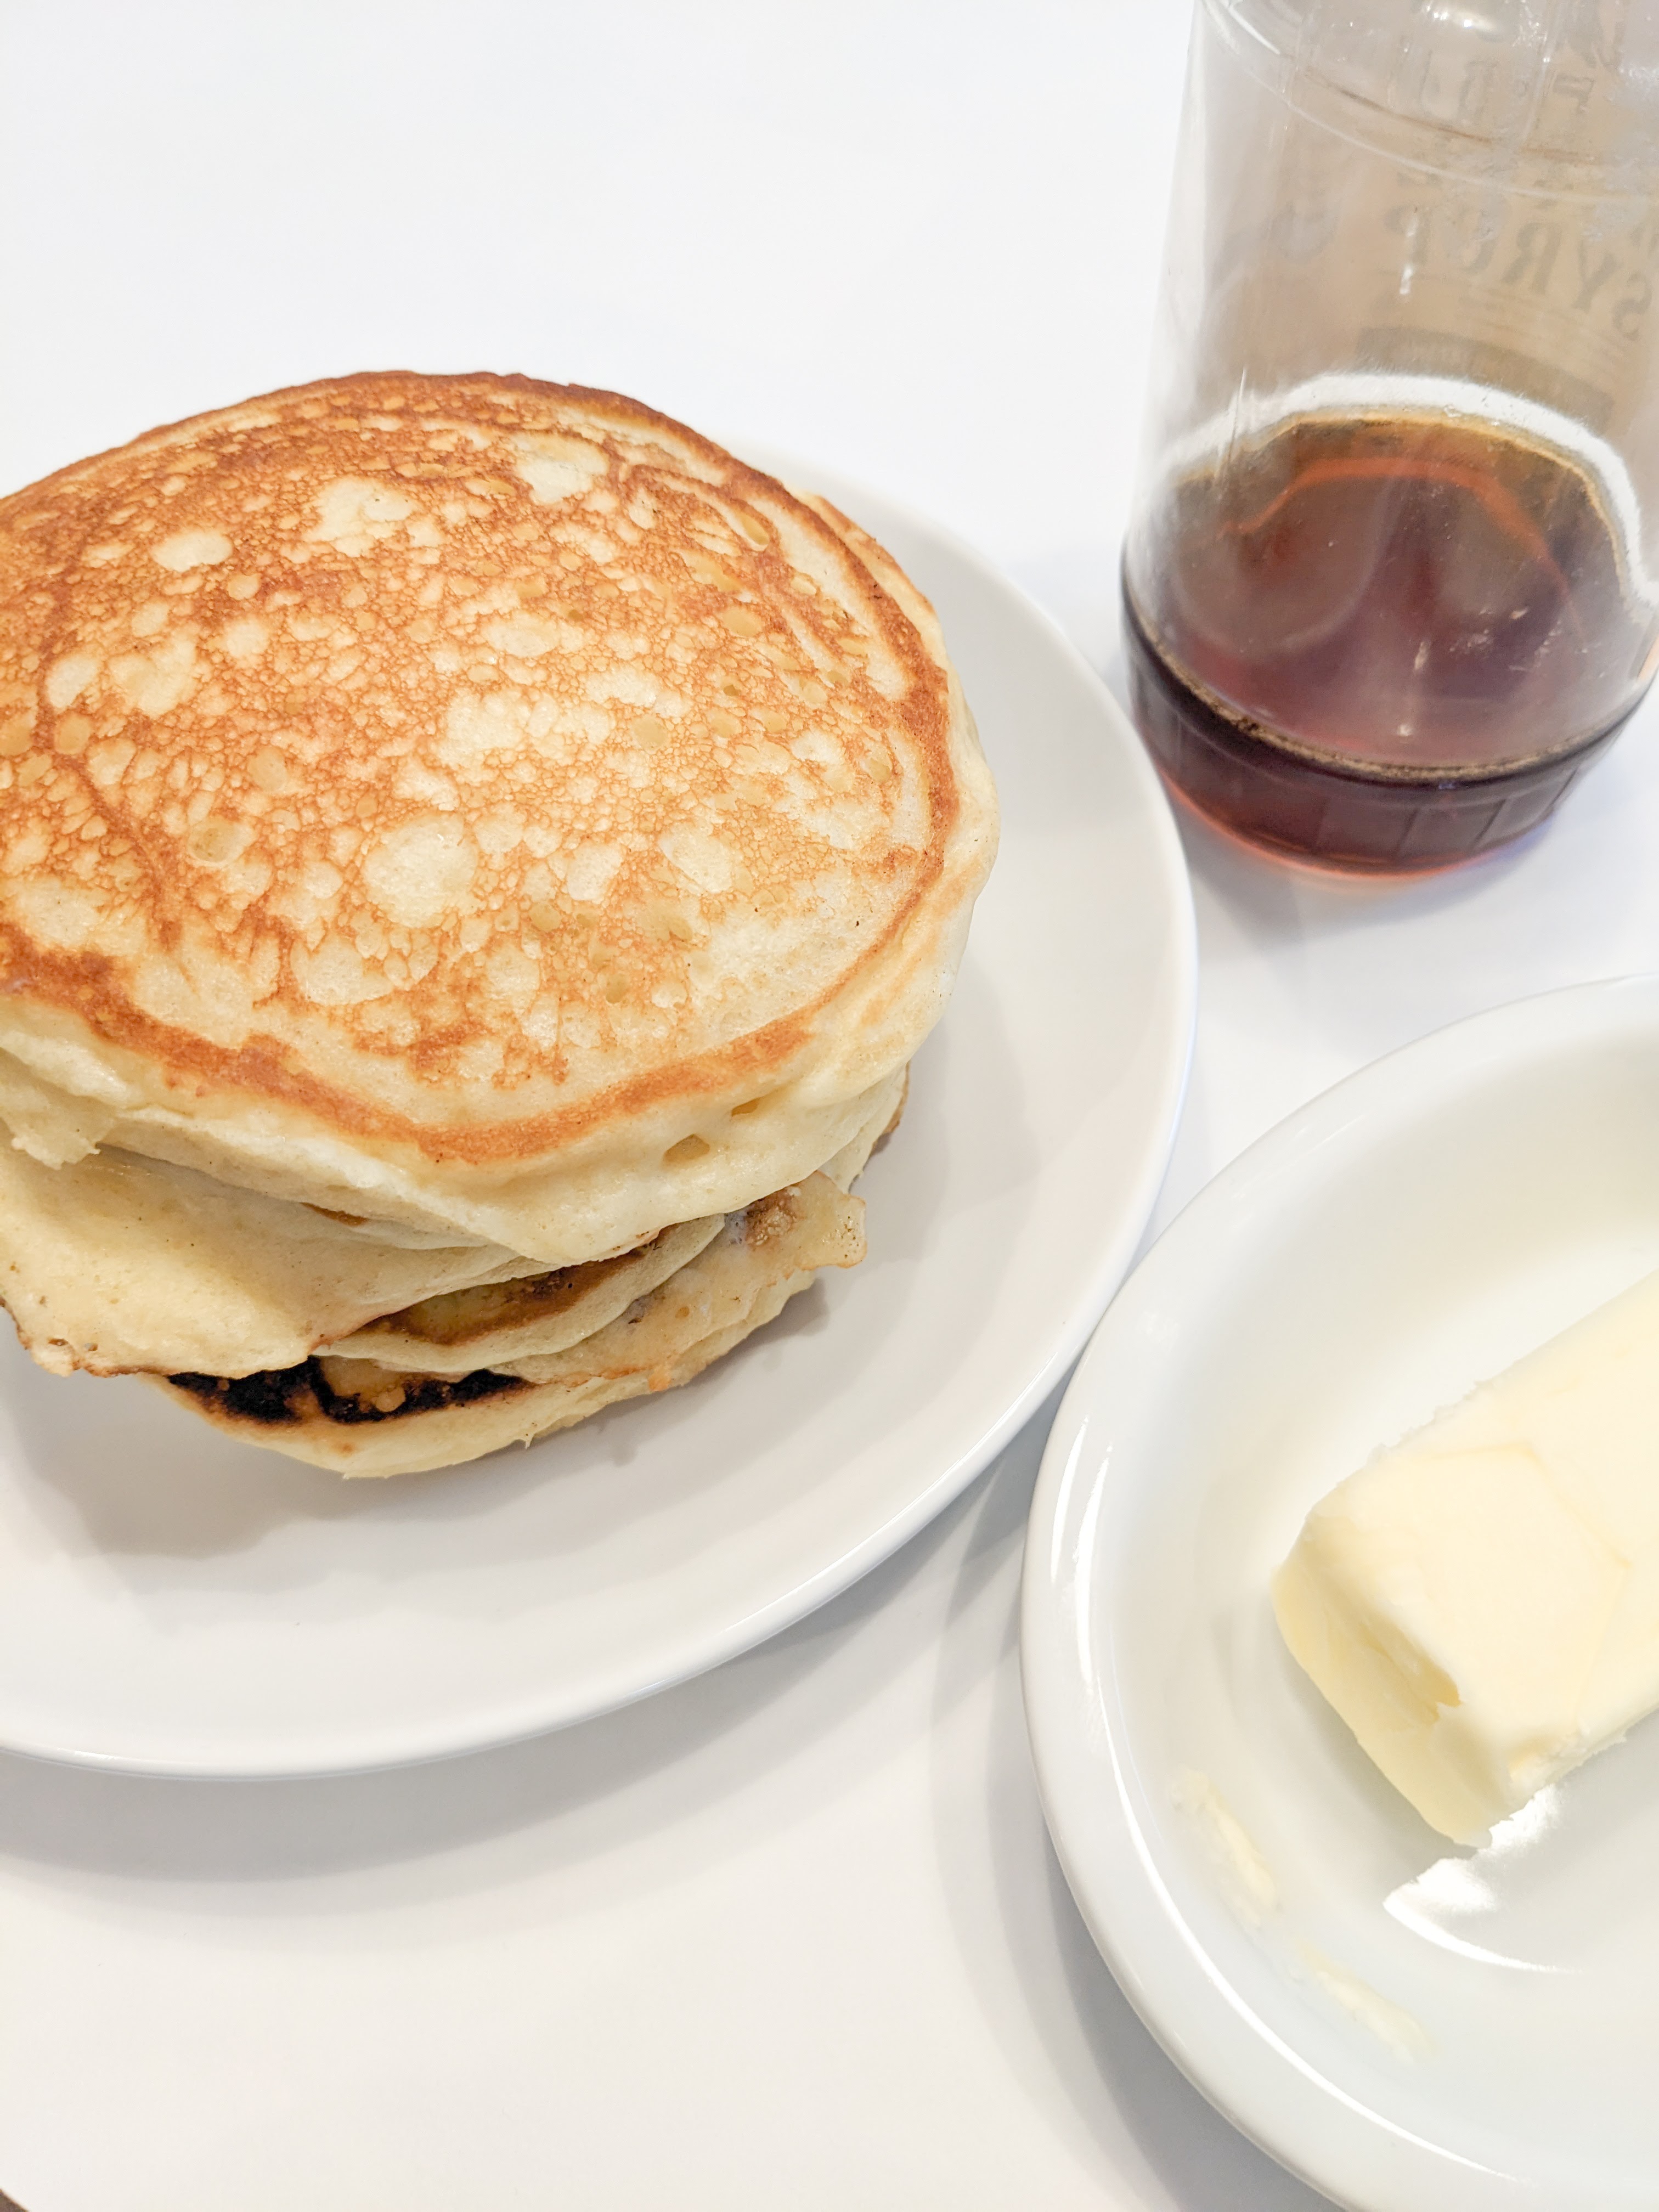
What is better than a pancake breakfast on the weekend?! I have tried so many different recipes for pancakes but could not get that perfect fluffy buttermilk pancake that you get at a local diner…until now. I have perfected my recipe for easy buttermilk pancakes. These pancakes are so delicous! They are super easy to whip up and perfect served with butter and maple syrup on top and a side of sausage links or bacon.
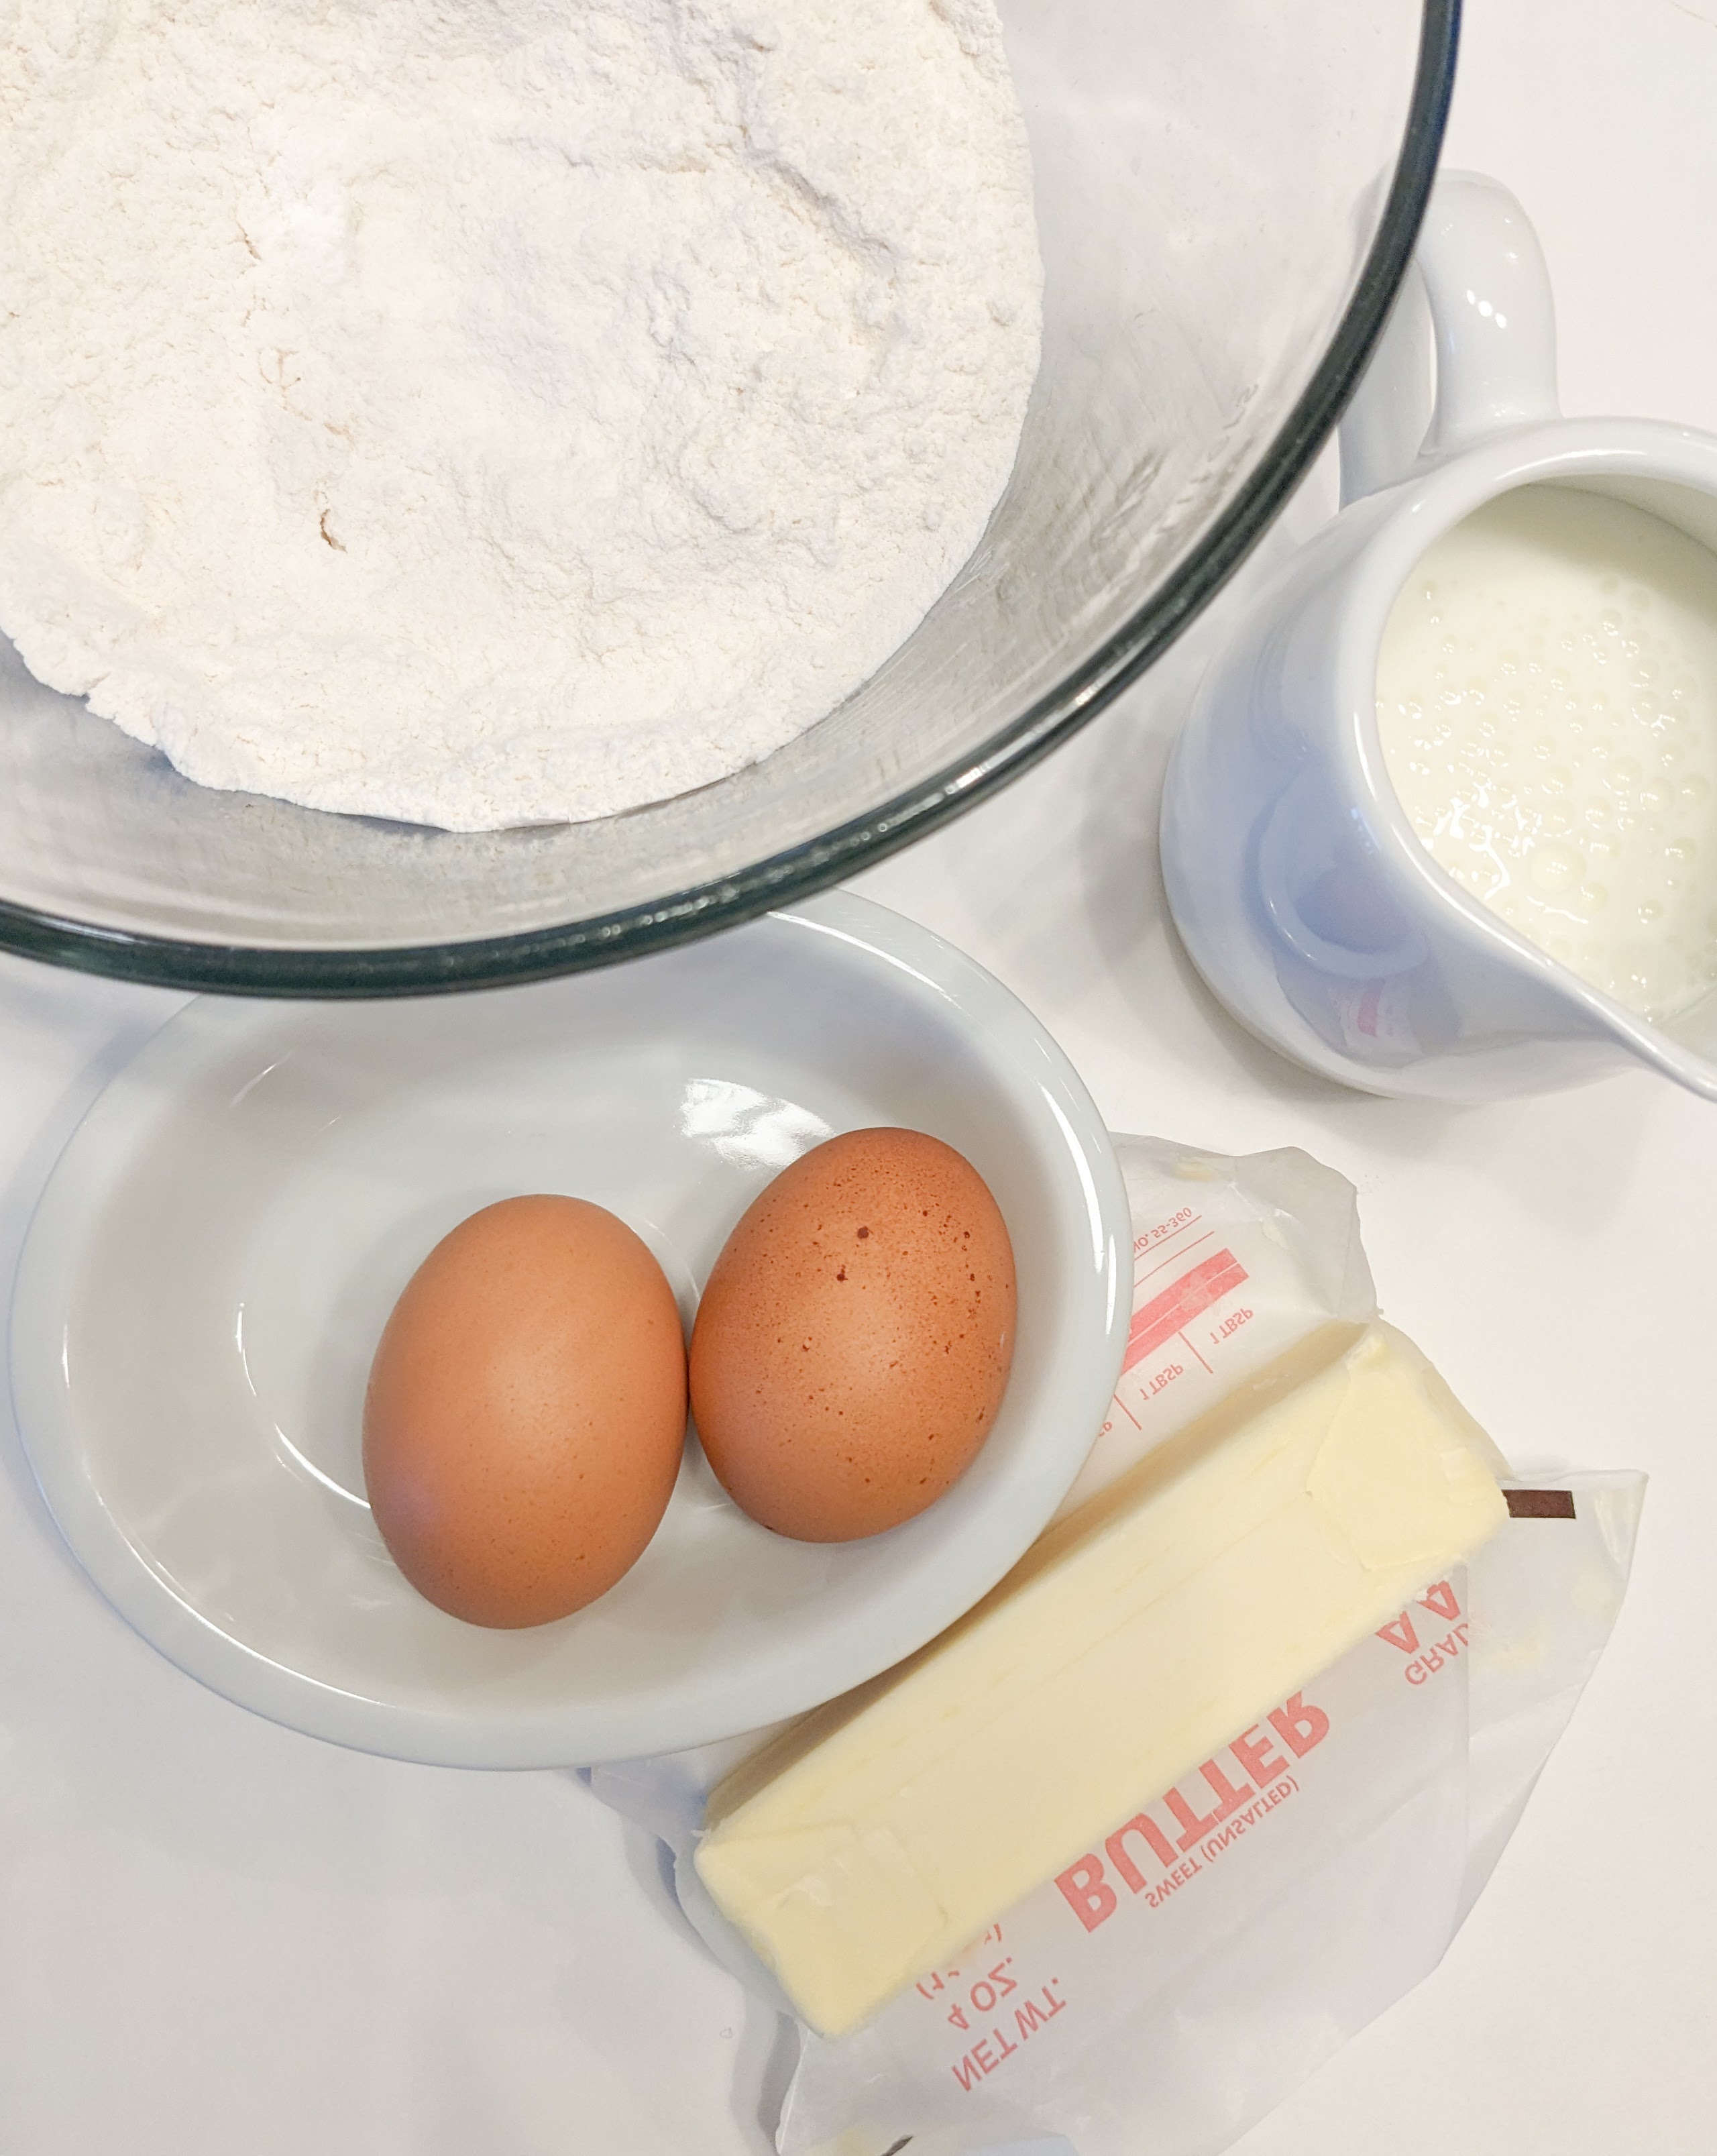
Ingredients:
- All-purpose flour
- Sugar
- Baking powder
- Baking soda
- Salt
- Buttermilk
- Eggs
- Melted butter
- Oil
Let’s Cook:
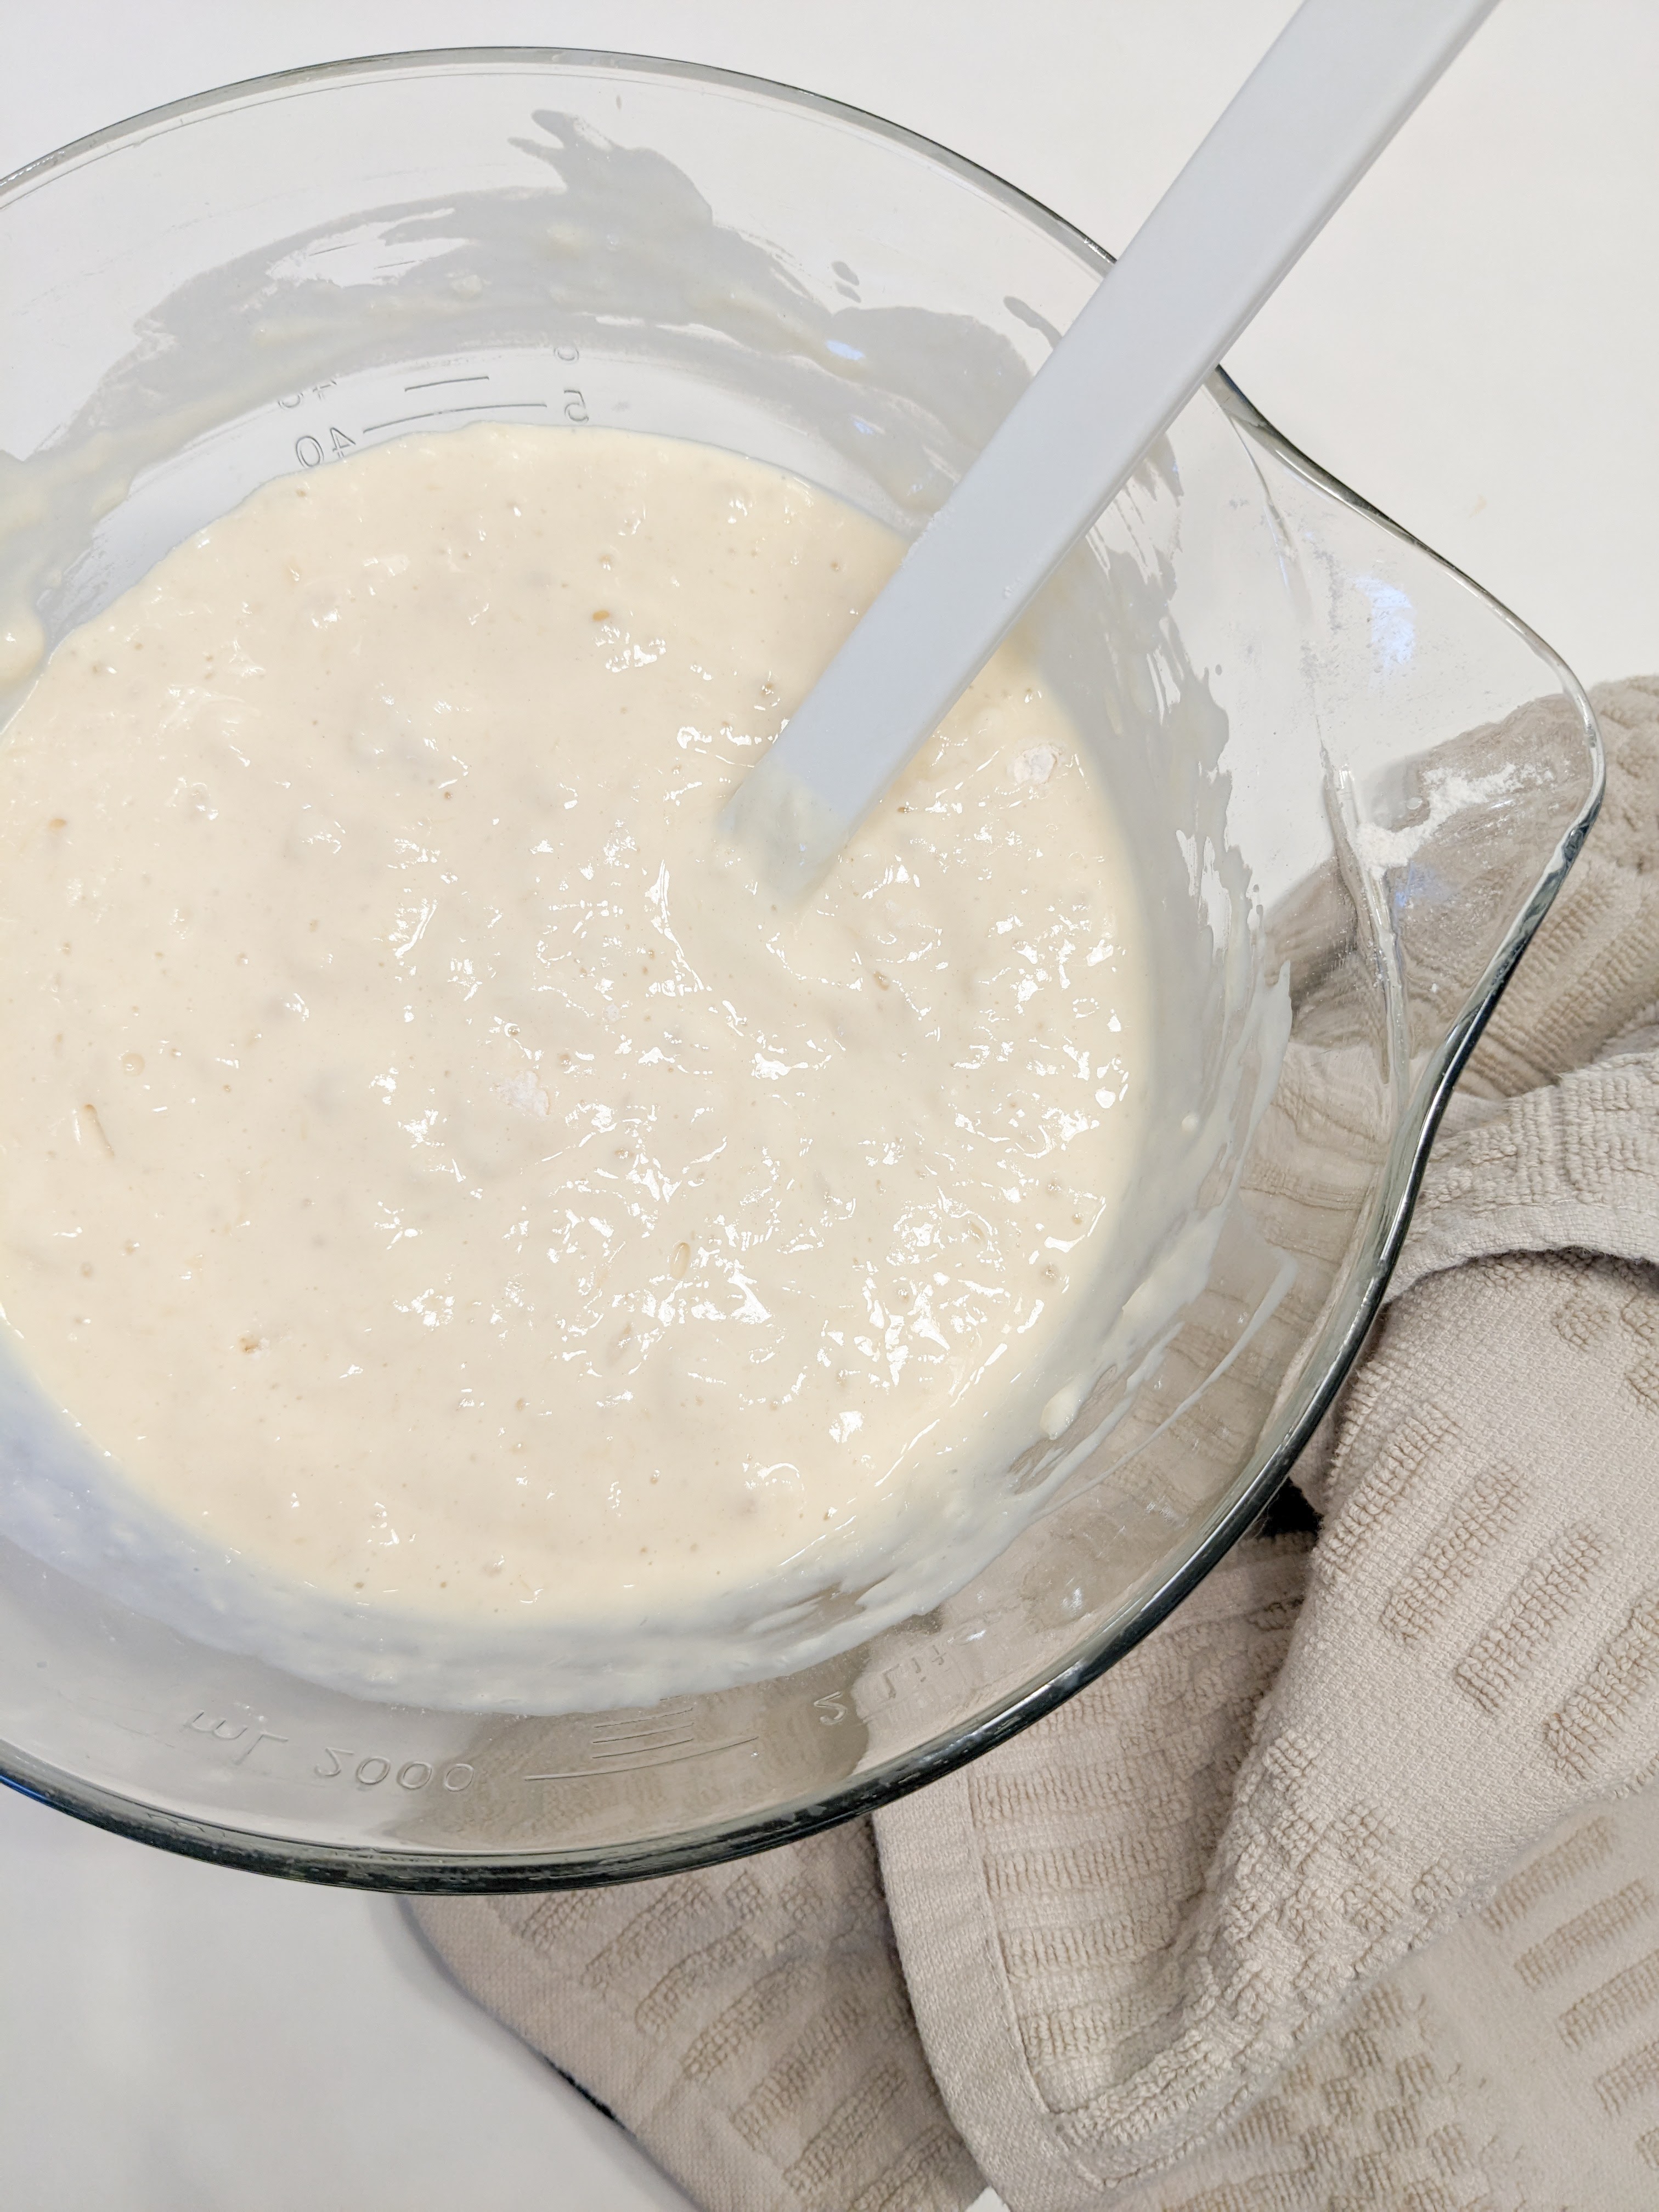
In a large mixing bowl, add the flour, sugar, baking powder, baking soda and salt. Mix these ingredients to combine. In a different bowl, add the buttermilk, eggs, and melted butter, and whisk to combine. In the middle of the dry ingredients, make a little well, and pour the wet ingredients in. Using a rubber spatula or wooden spoon, mix all the ingredients until combined. Don’t overmix the mix. It is ok if the mix is still a little lumpy.
Place a cast iron skillet or griddle over medium heat. Spray the skillet with vegetable oil or canola oil. Place about a teaspoon of butter on the griddle and allow the butter to melt. This will grease your skillet and add some delicious butter flavor to your pancakes. Scoop about a 1/4 cup of batter and place on the skillet to form the pancake. When bubbles start to form on the top of the pancake and the edges look dry and set, it is ready to be flipped. This will take about 2-3 minutes. Flip the pancake and cook the other side for another 2-3 minutes. Serve with butter and maple syrup, or toppings of choice.
If you like tangier pancakes, you can sub some of the buttermilk for sour cream. Feel free to mix it up and try adding different fruits, chocolate or nuts to this recipe as well. We like to try different variations like chocolate chip pancakes, blueberry pancakes, and pecan pancakes. I like to sprinkle these add-ins on top of the pancake when its cooking before I flip the pancake. I hope you enjoy ♥

Easy Buttermilk Pancakes
Ingredients:
- 2 cups all-purpose flour
- 3 tbsp granulated sugar
- 1 ½ tsp baking powder
- 1 ½ tsp baking soda
- 1 ¼ tsp salt
- 2 ½ cups buttermilk
- 2 large eggs
- 3 tbsp melted butter
- Vegetable oil or canola oil
Directions:
- In a large mixing bowl, add the flour, sugar, baking powder, baking soda and salt. Mix these ingredients to combine.
- In a different bowl, add the buttermilk, eggs, and melted butter. Whisk to combine.
- In the middle of the dry ingredients, make a little well and pour the wet ingredients in.
- Using a rubber spatula or wooden spoon, mix all the ingredients until combined.(Don’t overmix the mix, it is ok if the mix is still a little lumpy)
- Place a cast iron skillet or griddle over medium heat.
- Spray the skillet with vegetable oil or canola oil. Place about a teaspoon of butter on the griddle and allow the butter to melt.
- Scoop about a 1/4 cup of batter and place on the skillet to form the pancake.
- When bubbles start to form on the top of the pancake and the edges look dry and set, it is ready to be flipped. This will take about 2-3 minutes.
- Flip the pancake and cook the other side for another 2-3 minutes.
- Serve with toppings of choice.
Notes.
- If you like tangier pancakes, only use 2 cups of buttermilk and add in ¼ cup of sour cream.
- Different add-in options include chocolate chips, blueberries, strawberries, pecans, or walnuts.
-
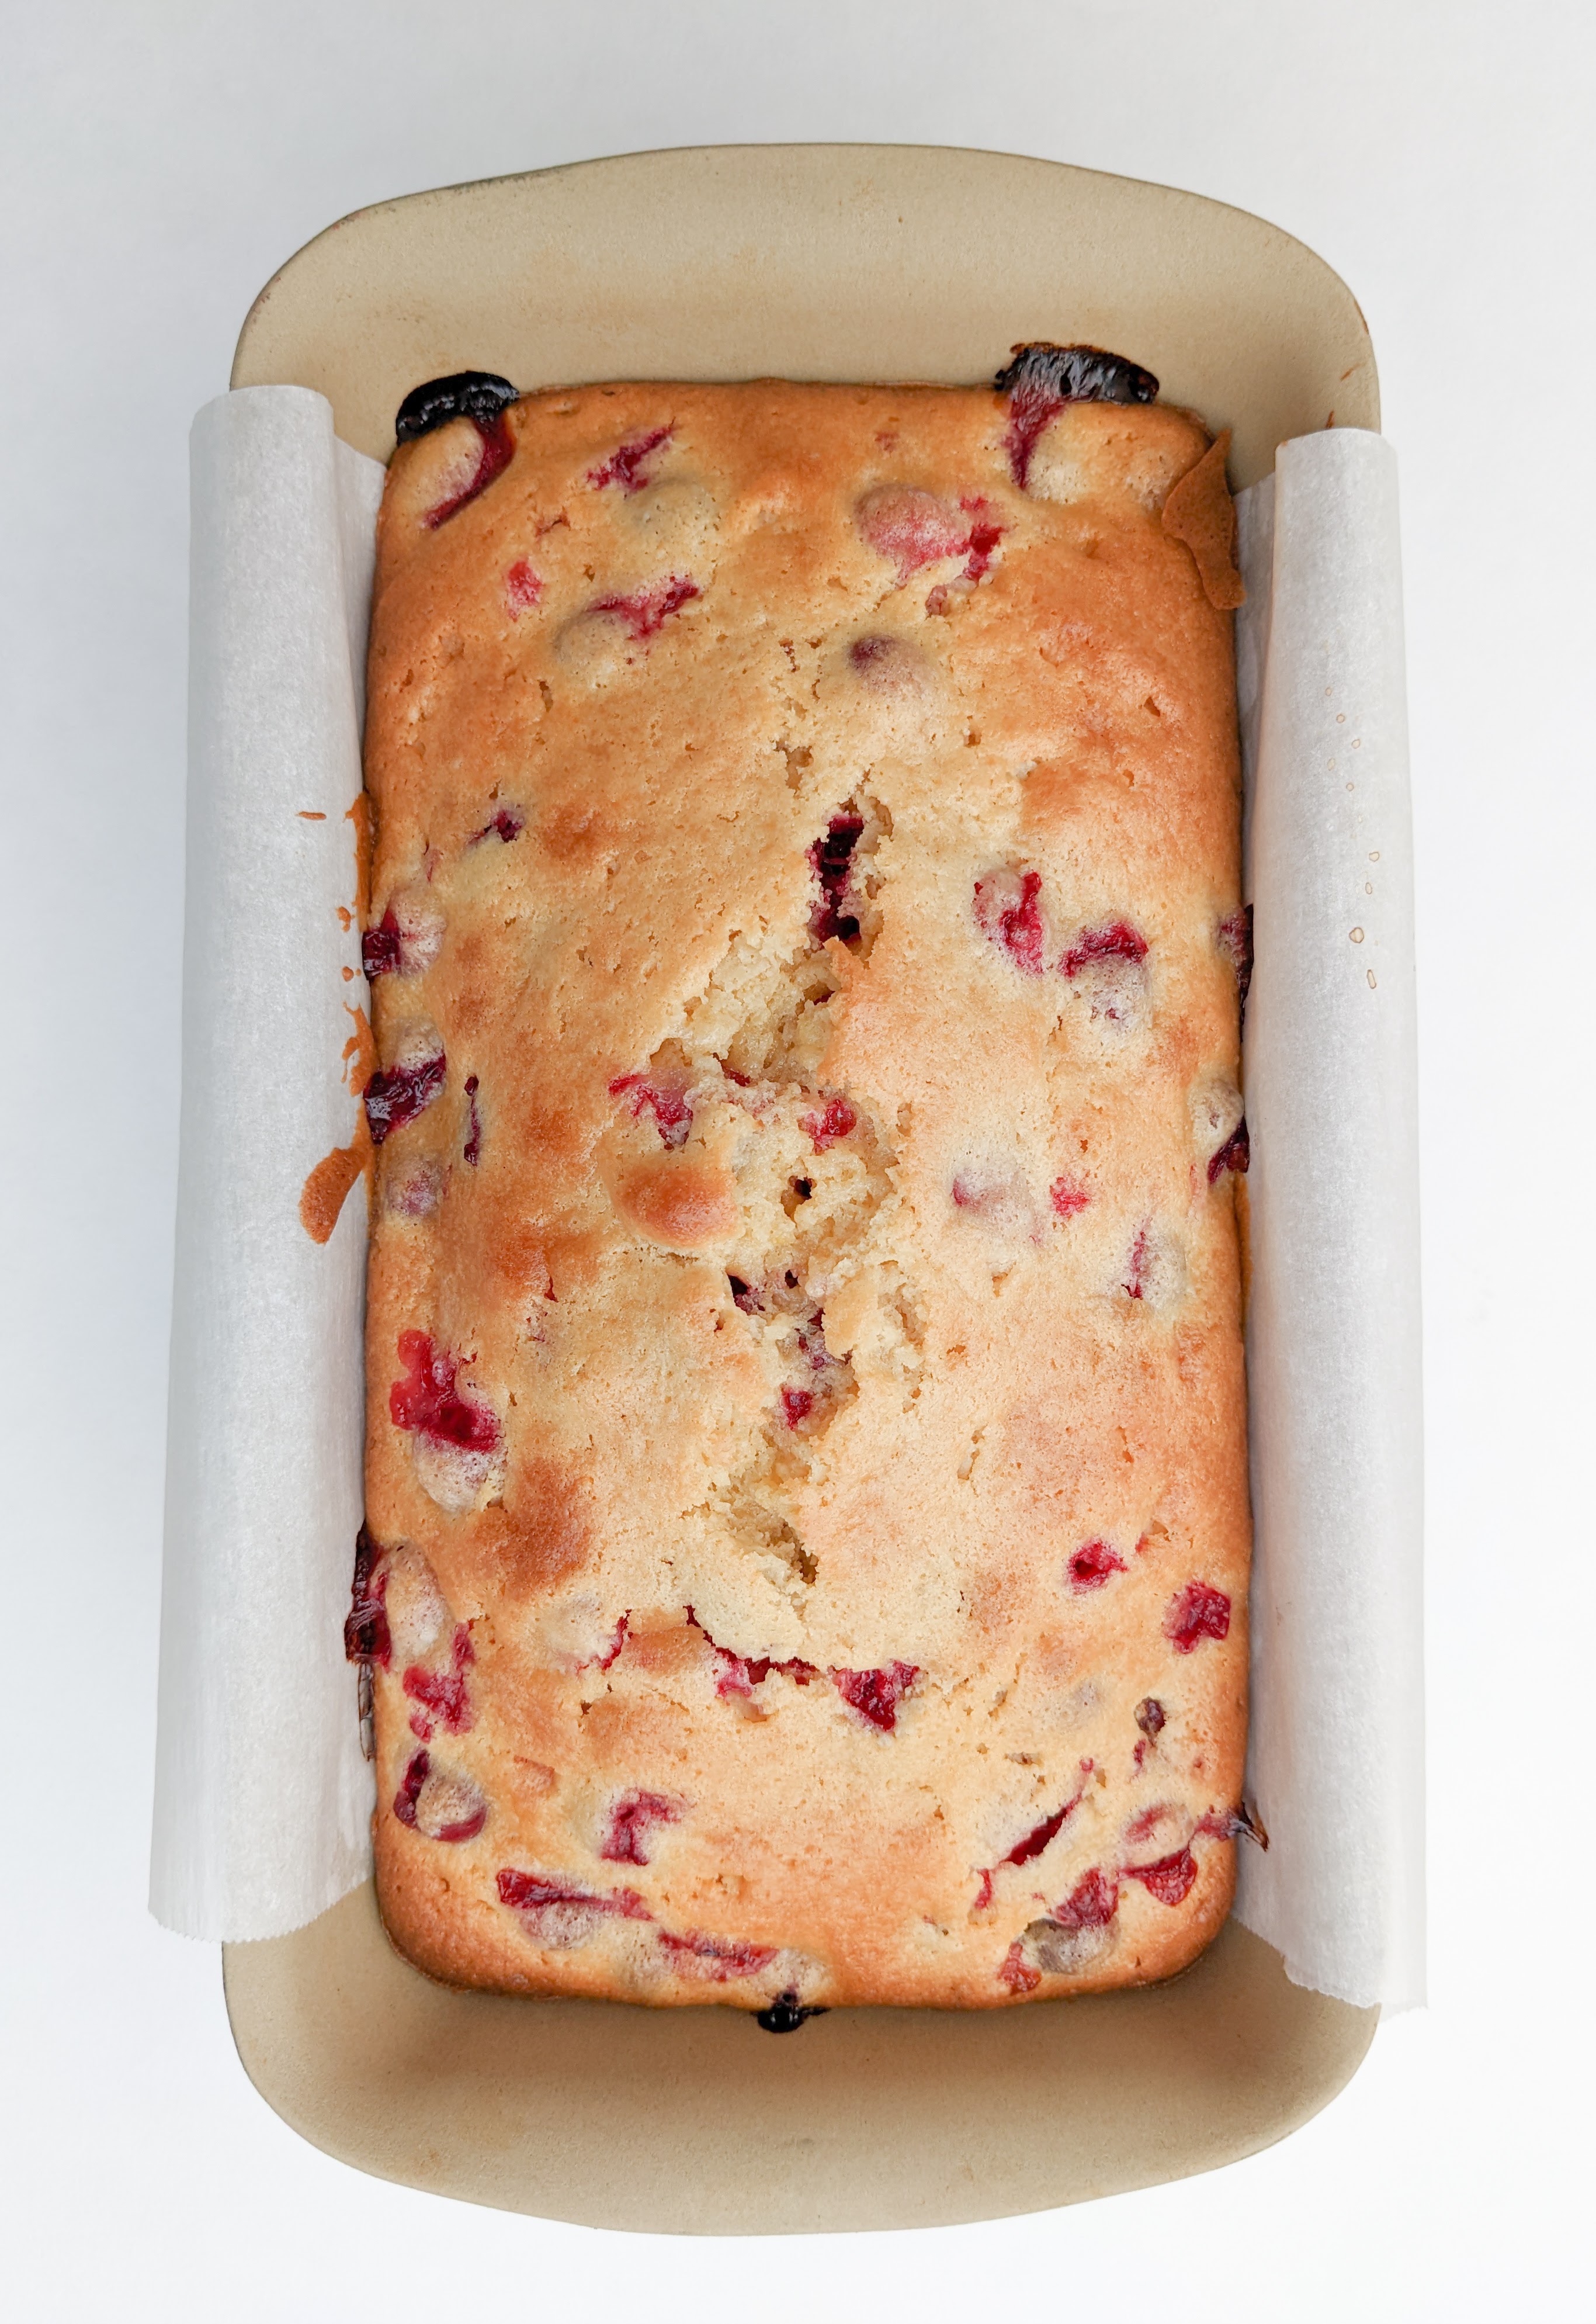
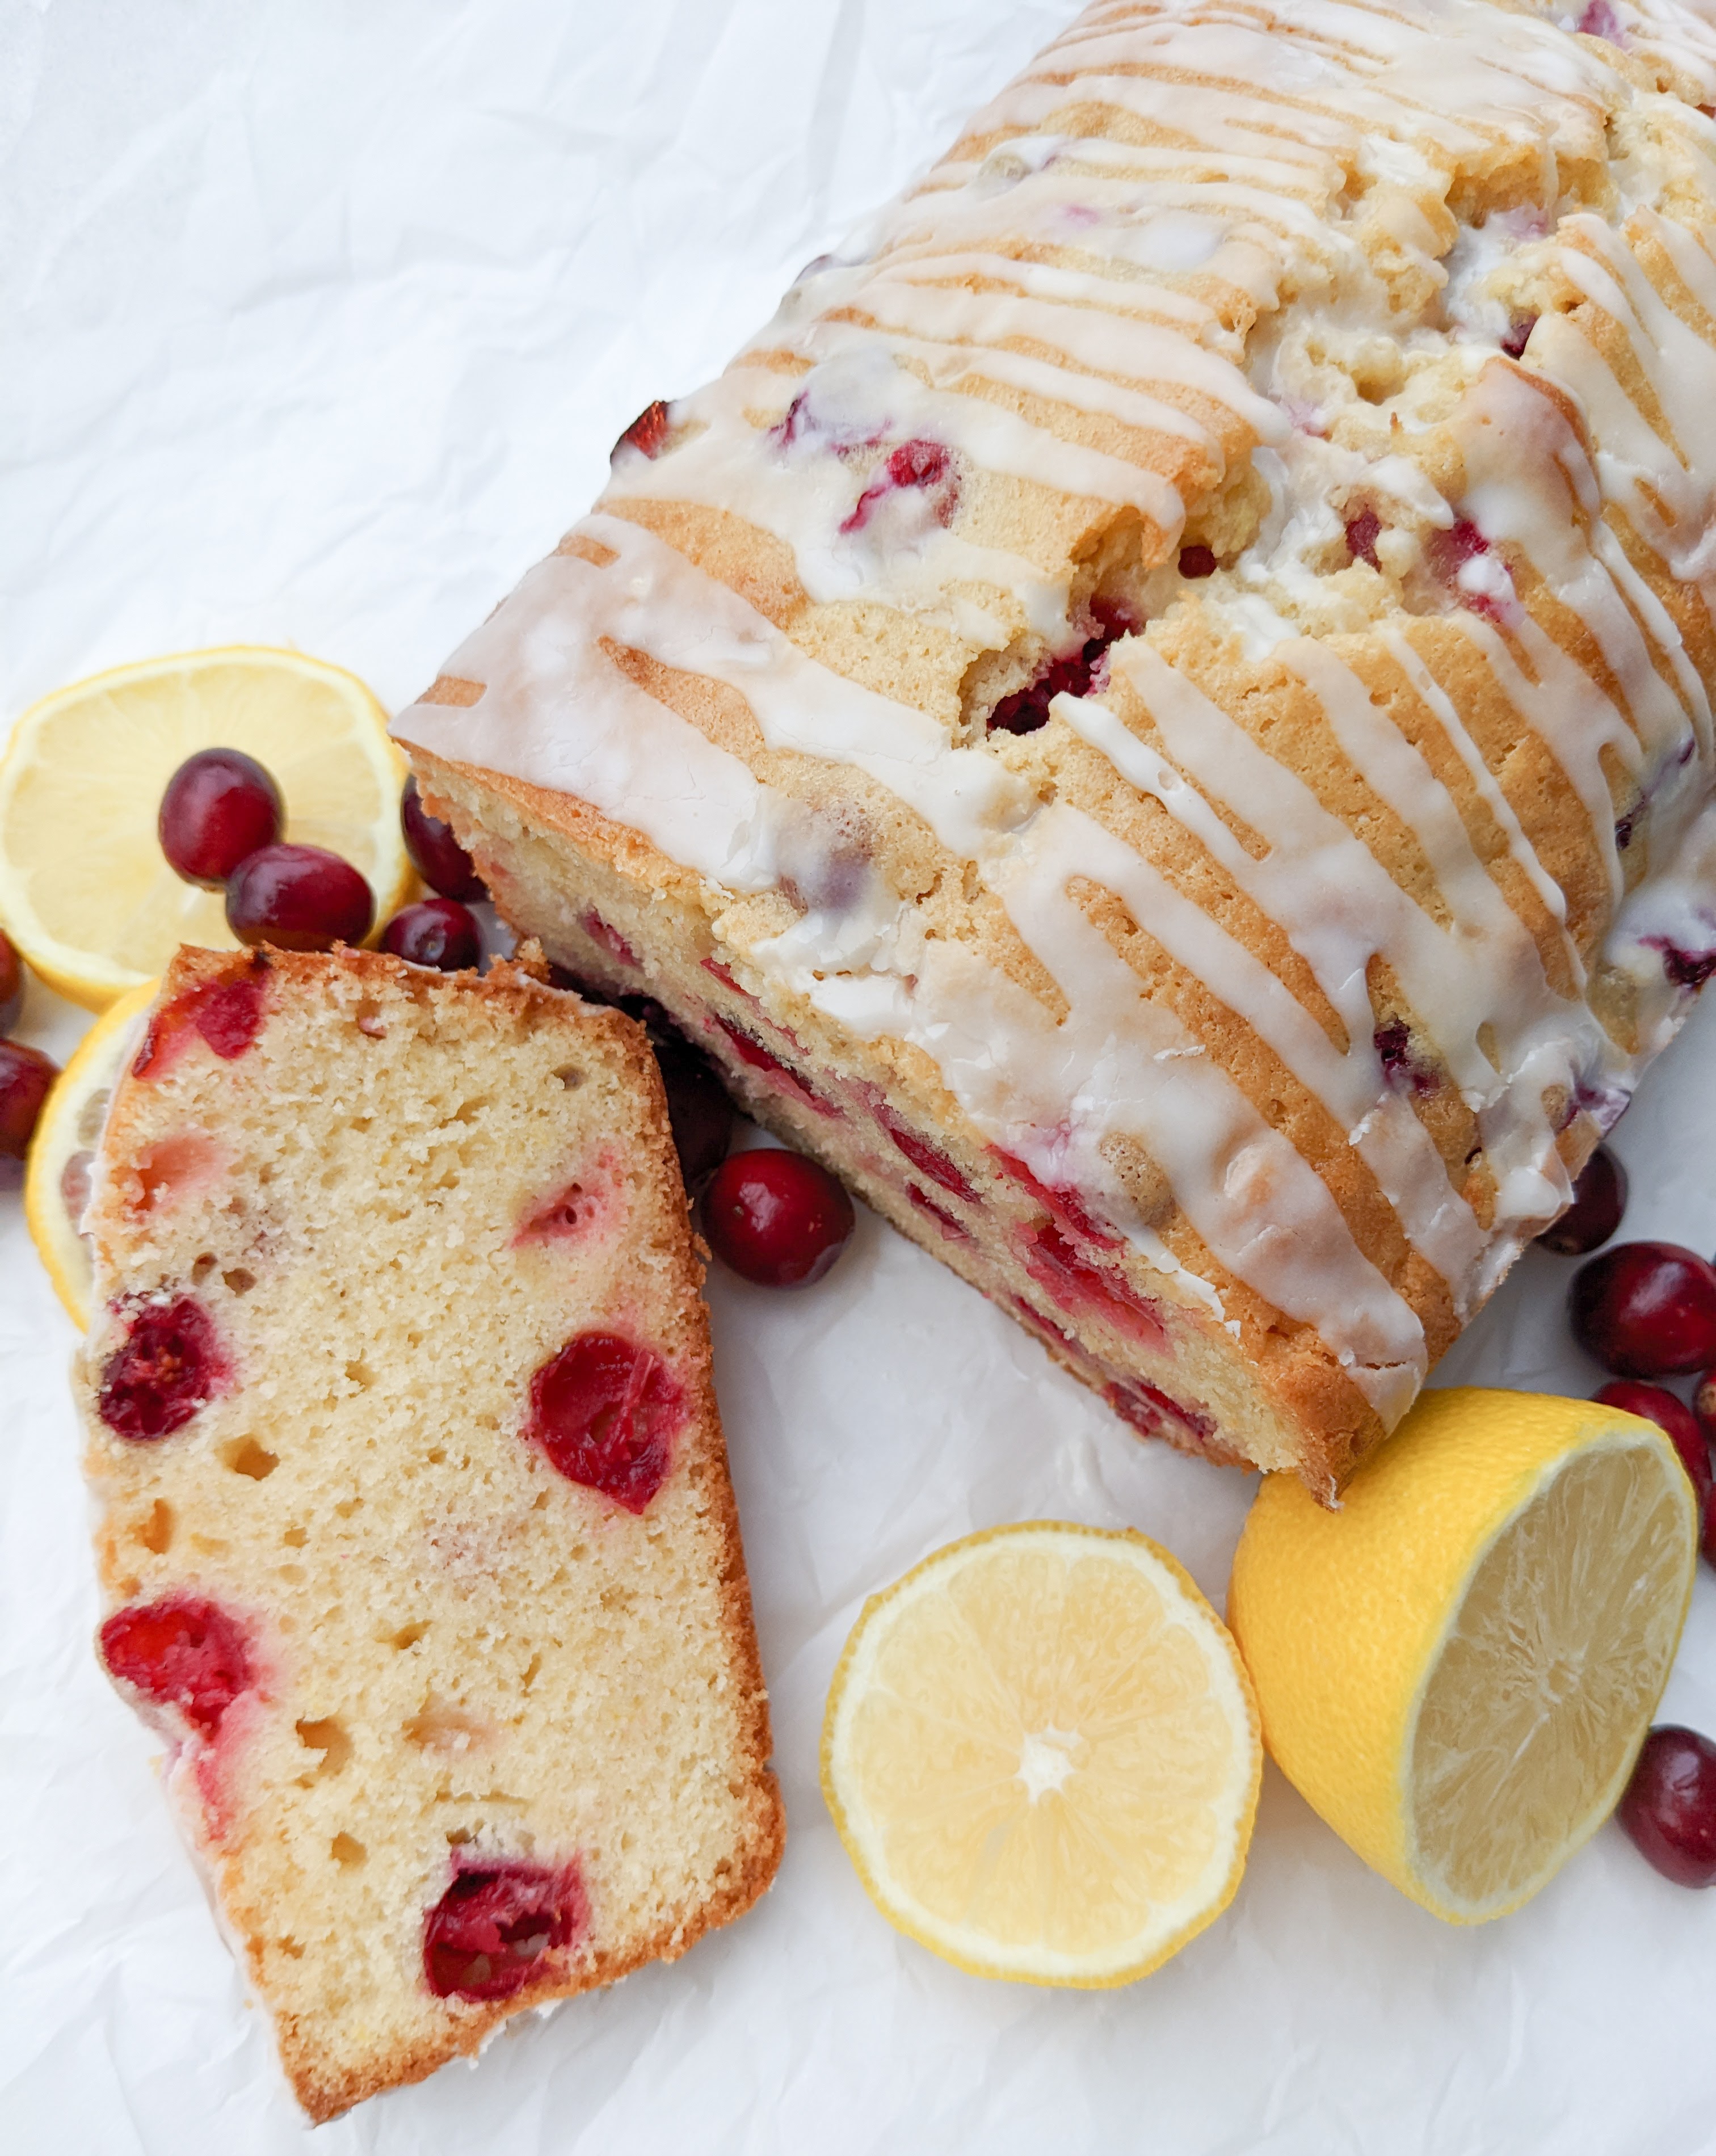
Cranberry Lemon Loaf

It has been frigidly cold here in Wisconsin the last couple of days. But next week, we are jumping up to the 30’s and may even hit 40 degrees by mid week. This cranberry lemon loaf is the perfect mix of winter and spring. The tart cranberries remind me of the winter holidays, while the sweet lemon gives just a touch of spring. This bread is so good served either warm or cold.

Ingredients:
- Salted butter, room temperature
- Sugar
- Eggs
- Lemon, for zesting and juice
- Vanilla extract
- Flour
- Salt
- Baking soda
- Baking powder
- Sour cream
- Cranberries
- Powdered sugar
Let’s Bake:
Preheat your oven to 325°F. Prepare a loaf pan by lining it with parchment paper. In a large mixing bowl or a stand mixer with a paddle attachment, cream together the butter and sugar for 3 minutes until light and fluffy. Add in the room temperature eggs one at a time, until they are incorporated. After all the eggs are added, continue to mix for an additional 2 minutes. Stir in the lemon zest, lemon juice, and vanilla extract.
In a spearate bowl, whisk together the flour, salt, baking soda and baking powder. With the stand mixer on low, alternate adding the dry ingredient mixture and the sour cream. Add in 1/3 of the dry mixture, followed by half of the sour cream, 1/3 of the dry mixture, the rest of the sour cream, and then the rest of the dry mixture. When the dry ingredients and sour cream are well incorporated, fold in the cranberries. Add the batter to the prepared loaf pan and bake for one hour. The loaf is done when the top is a nice golden color and a toothpick inserted into the center comes out clean. Allow the loaf to cool in the loaf pan for 10 minutes and then transfer to a wire rack to continue cooling.
To make the glaze for the top of the loaf, add the powdered sugar and lemon juice to a bowl. Mix well until the mixture is smooth and all the lumps are gone. If needed, you can add more lemon juice or a splash of water to make it smooth. Drizzle the glaze over the cooled loaf. Allow the glaze to dry before serving. I hope you enjoy ♥

Cranberry Lemon Loaf
Ingredients:
½ cup salted butter, room temperature
1 cup sugar
3 large eggs, room temperature
1 tbsp lemon zest
1 tbsp lemon juice, +2 tbsp lemon juice for glaze
1 tsp vanilla extract
1 ½ cup all-purpose flour
¼ tsp salt
¼ tsp baking soda
¼ tsp baking powder
⅓ cup sour cream, room temperature
1 ¼ cup cranberries
1 cup powdered sugar
Directions:
- Preheat oven to 325°F. Prepare a loaf pan by lining it with parchment paper.
- In a large bowl or stand mixer with a paddle attachment, cream together the butter and sugar for 3 minutes until light and fluffy.
- Add the eggs, one at a time. Continue to mix for an additional 2 minutes after all the eggs are added.
- Stir in the lemon zest, lemon juice, and vanilla extract.
- In a separate bowl, whisk together the flour, salt, baking soda, and baking powder.
- With the stand mixer on low, carefully mix in ⅓ of the dry mixture, ½ of the sour cream, ⅓ of the dry mixture, the rest of the sour cream, and then the rest of the dry ingredients.
- Fold in the cranberries.
- Add the batter to the prepared loaf pan. Bake for 60 minutes, or until a toothpick inserted into the center comes out clean.
- Cool in the loaf pan for 10 min. Remove from the loaf pan and allow to cool completely on a wire rack.
- To make the glaze for the top, in a medium sized mixing bowl, add the lemon juice and powdered sugar. Mix until smooth. If needed, you can add extra lemon juice to make smooth.
- Drizzle the glaze over the cooled loaf and allow the glaze to dry before serving.

About Me
My name is Kassey Bohrer. I am a mom of 3 wonderful children and recipe creator. I love to bake and share with others. Please enjoy these recipes, from my kitchen to yours.
Follow Me On
Contact Me
Send me an email if you have any questions or recipe suggestions. I would love to hear from you.
